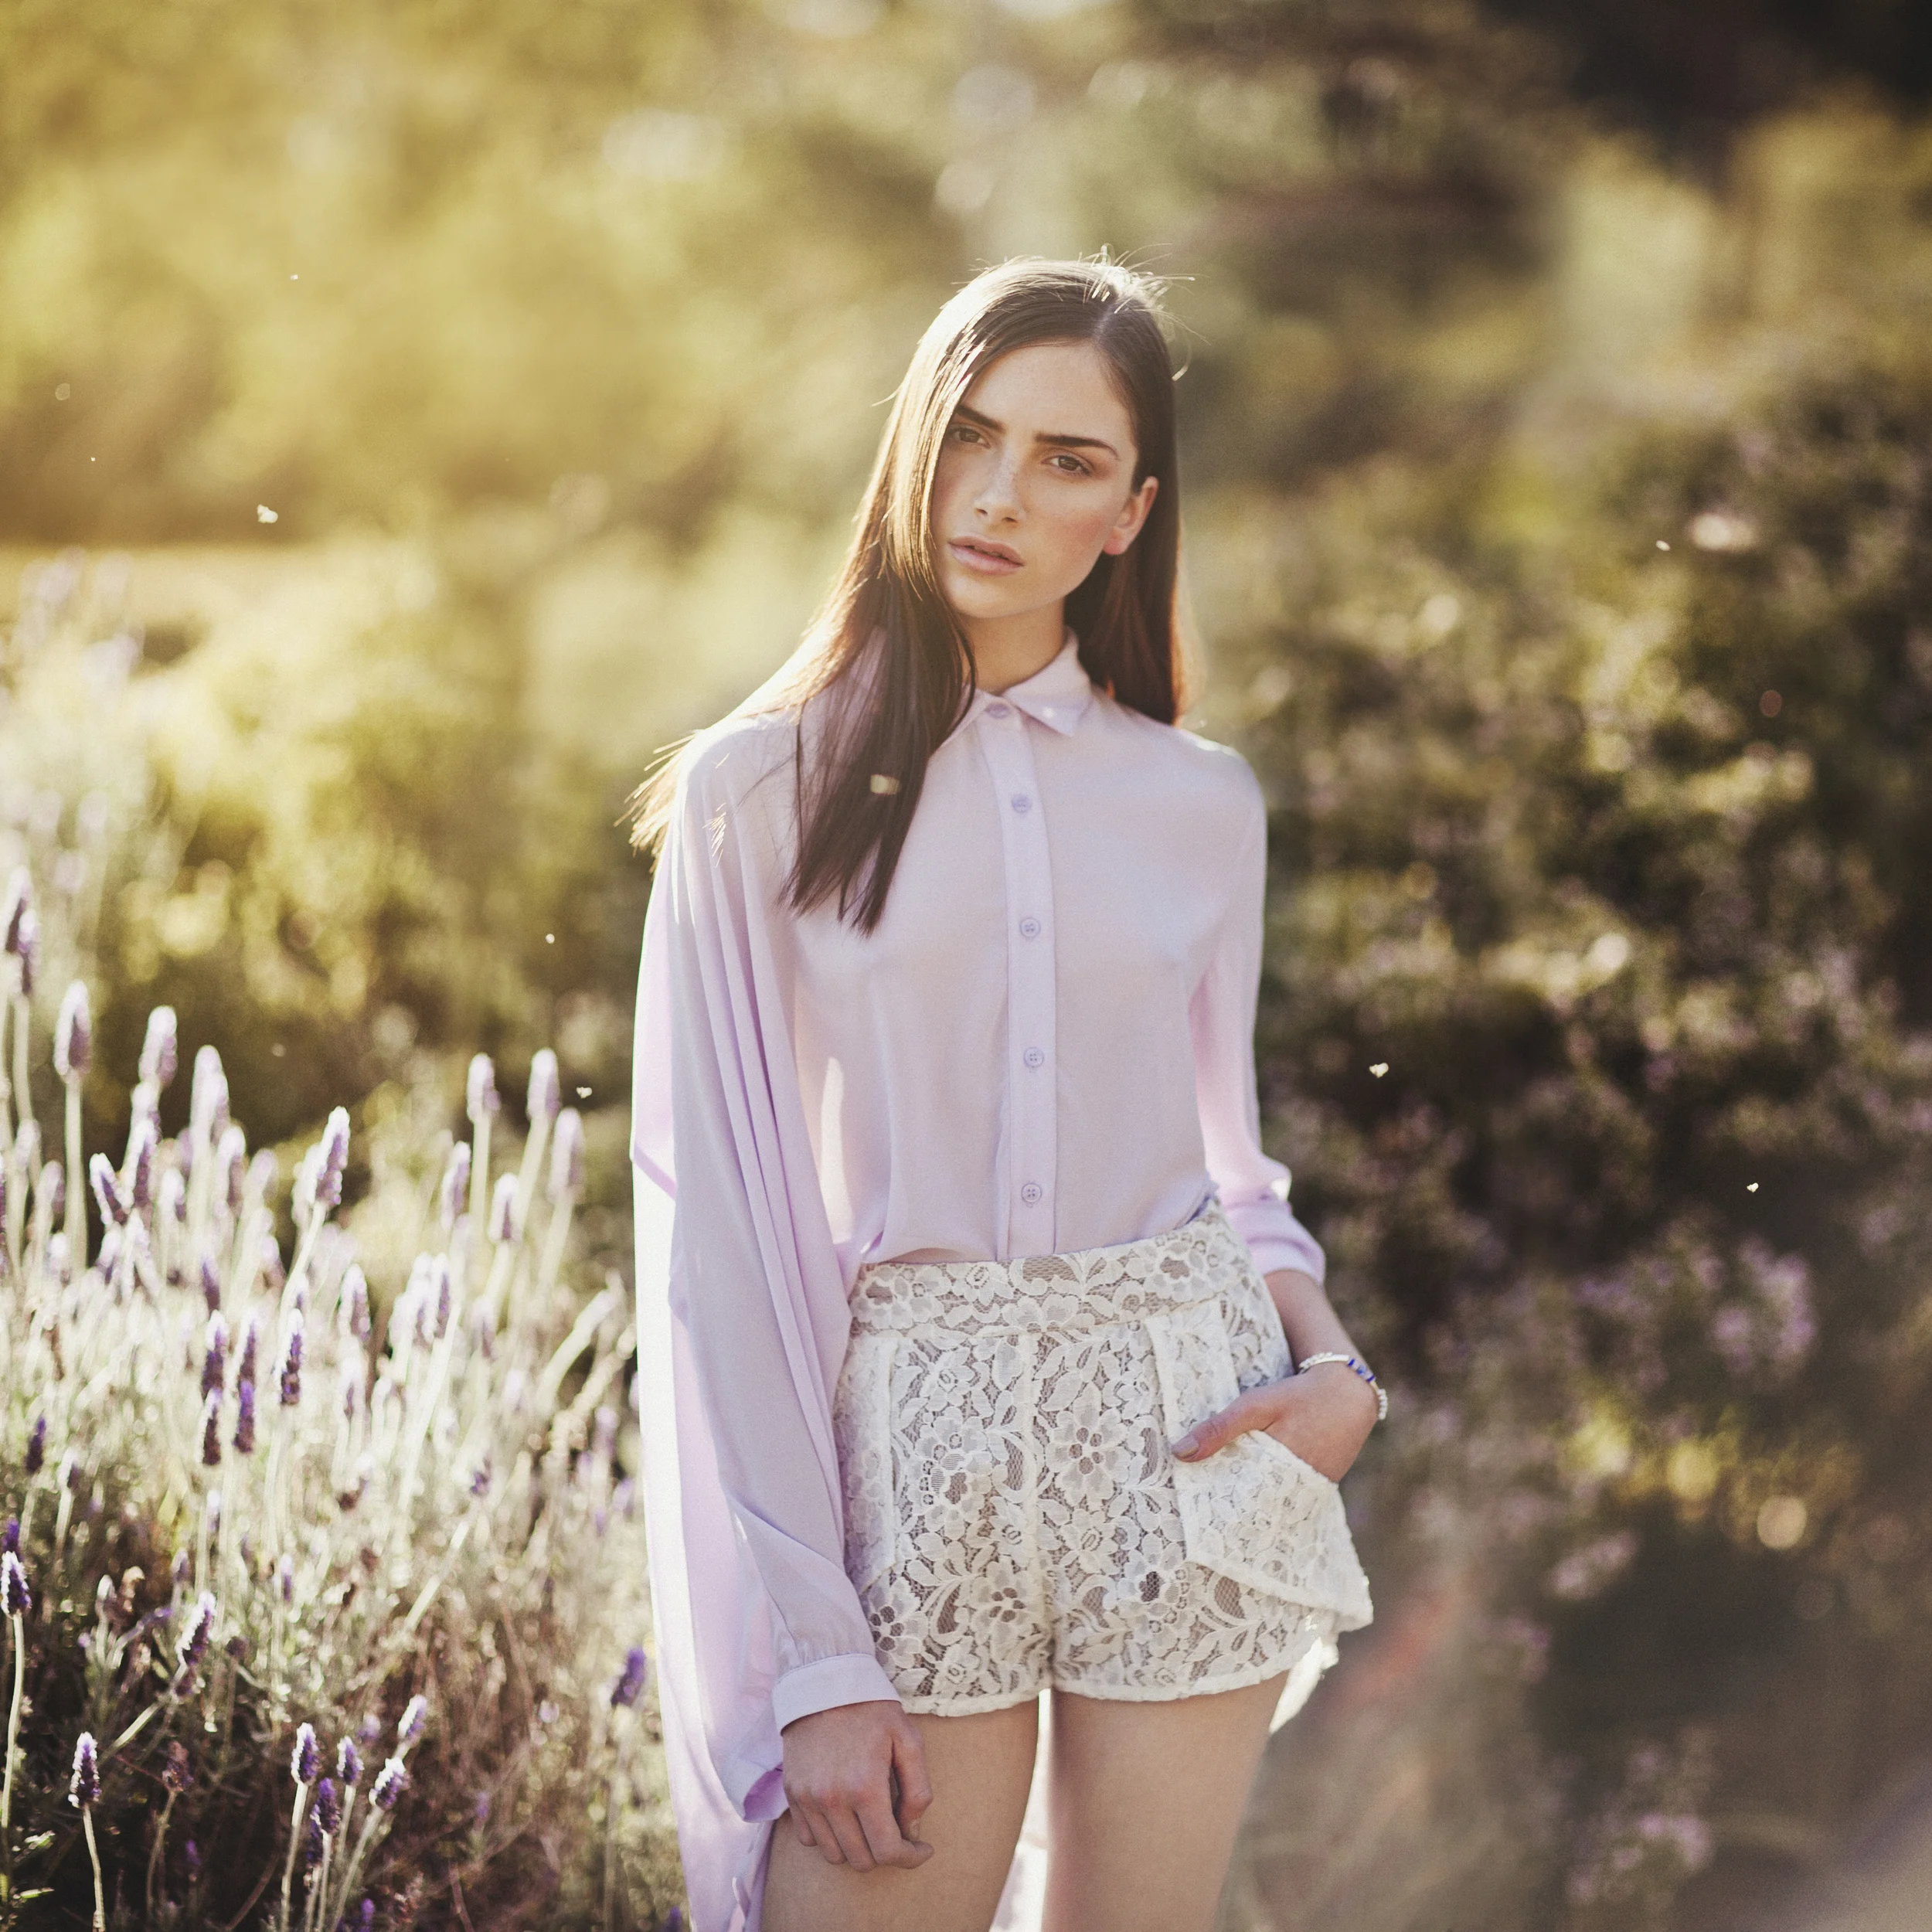

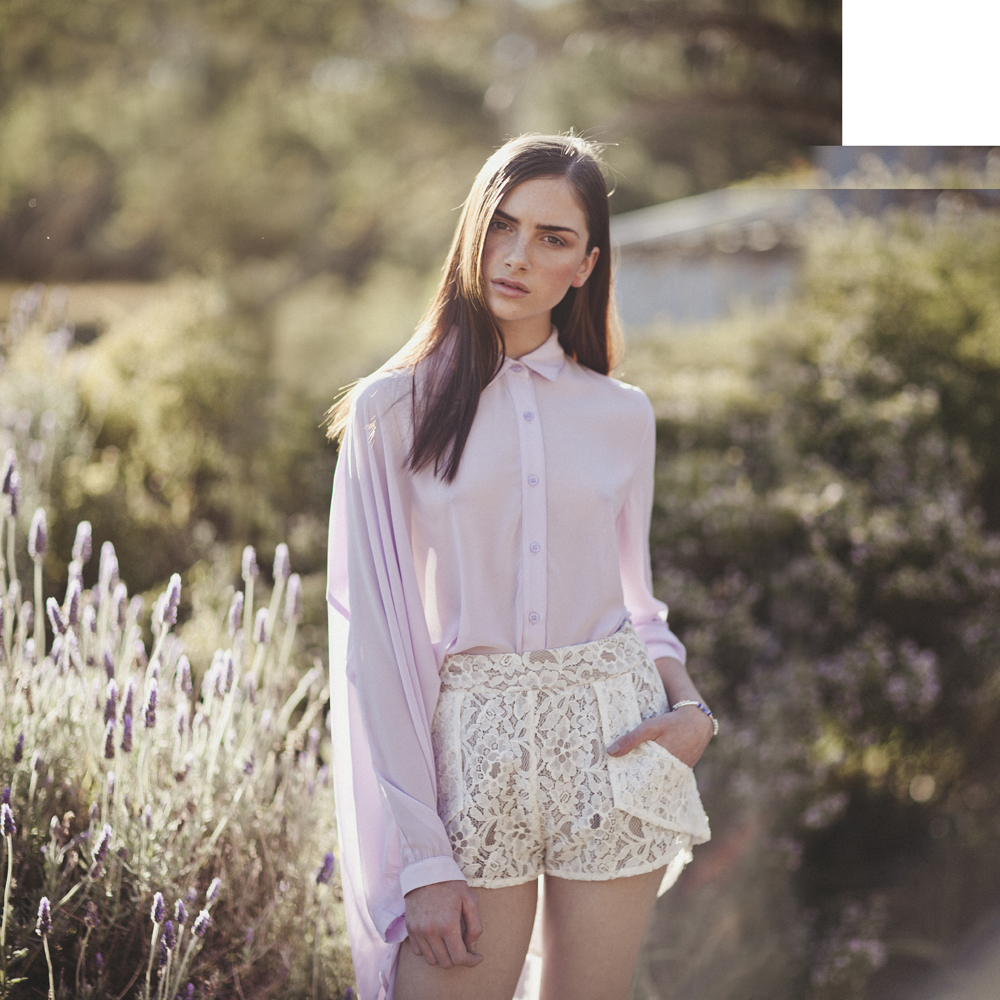
I uploaded this speed editing video to my youtube channel a long time ago, and I finally thought it was time to write up a tutorial to follow it! Above is the final image and below is the image I took straight out of the camera. You can watch the youtube speed editing video to see my process, and below I have finally written up the steps I took to create this image! Enjoy!
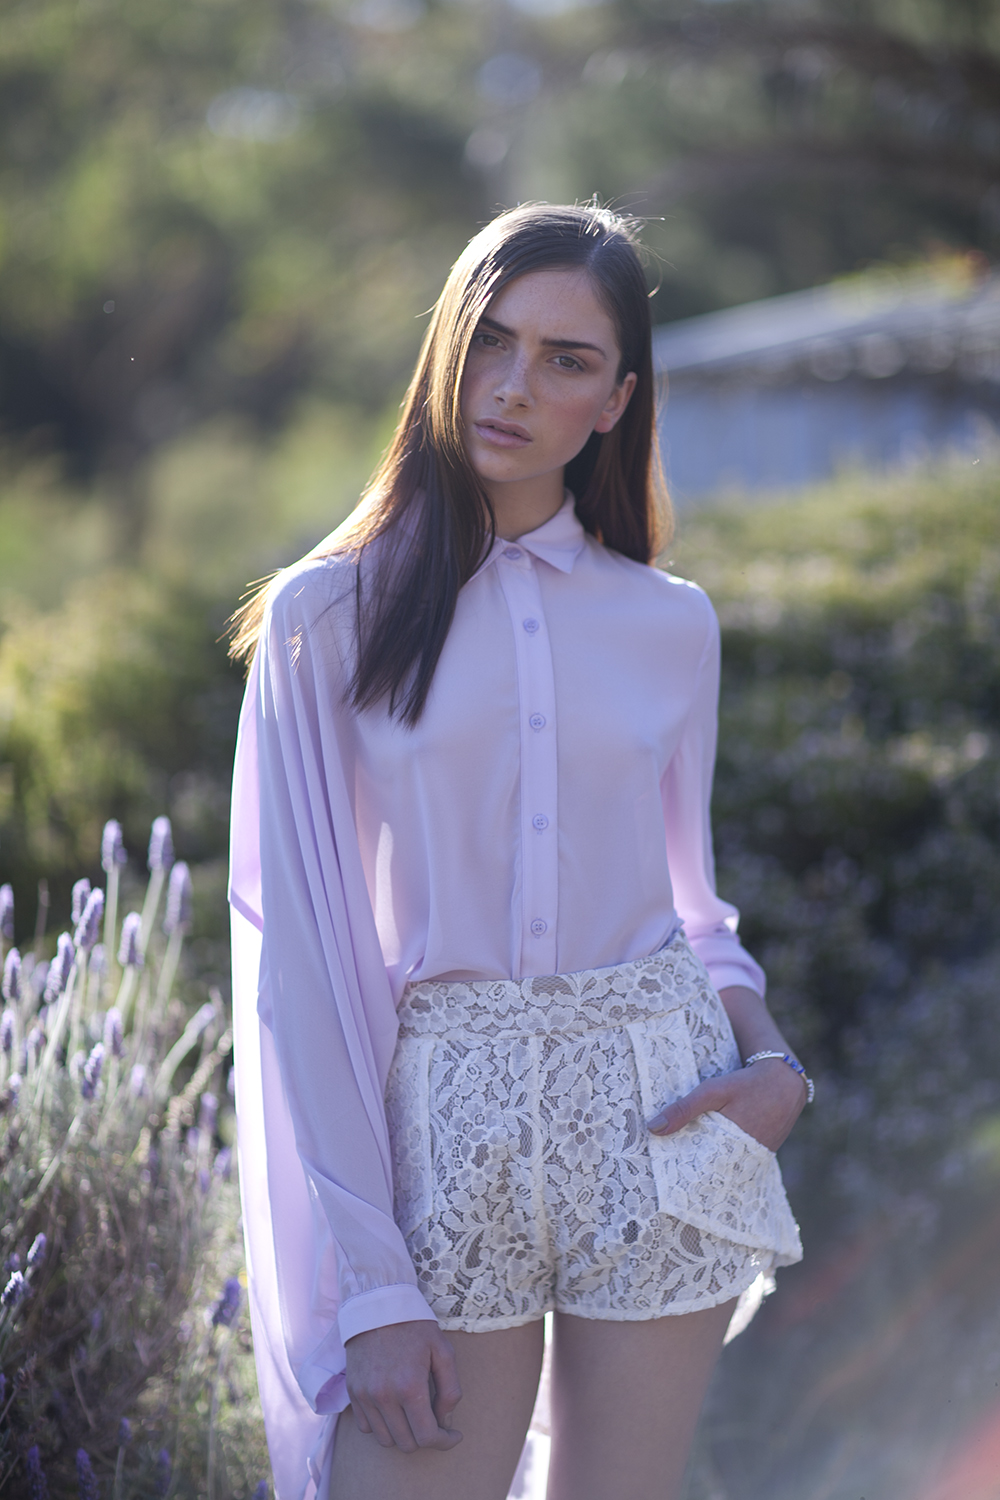
01. Lightroom Editing // This is the original image straight out of the camera, no editing done yet whatsoever. The first thing I do to any image is open it in Lightroom. In Lightroom I applied my Wild Bird Preset from Digital Film Action to colour my photo to work as a base for my expansion. I made a few minor tweaks to the exposure and white balance and opened up my image in Photoshop.
02. The Expansion Process // In Photoshop begins my expansion process. I didn't plan to create an expansion with this photo when I first took it, so it took a creative eye to find the right background to stitch to the photo from other photos I took on the day.
I went through all the photos I took around this one and picked out the ones I could use the background of to add to this image. I then imported all those photos to Lightroom and synced the edits so all the images would have the same colours and tones applied to them to make the stitching process easier.
03. Stitching Images Together // When expanding a photo with a busy background, I aim to focus on particular areas and expand the image slowly rather than doing all of it at once. In this case, I started with the top left hand corner first as it was the easiest in my opinion - it was very blurred bokeh trees that were easy to blend together. I used the Lasso tool to select a similar looking area from another photo then dragged it into place on the image I am working on. I add a layer mask and use a low opacity (about 20%), soft brush to slowly blend in the edges.

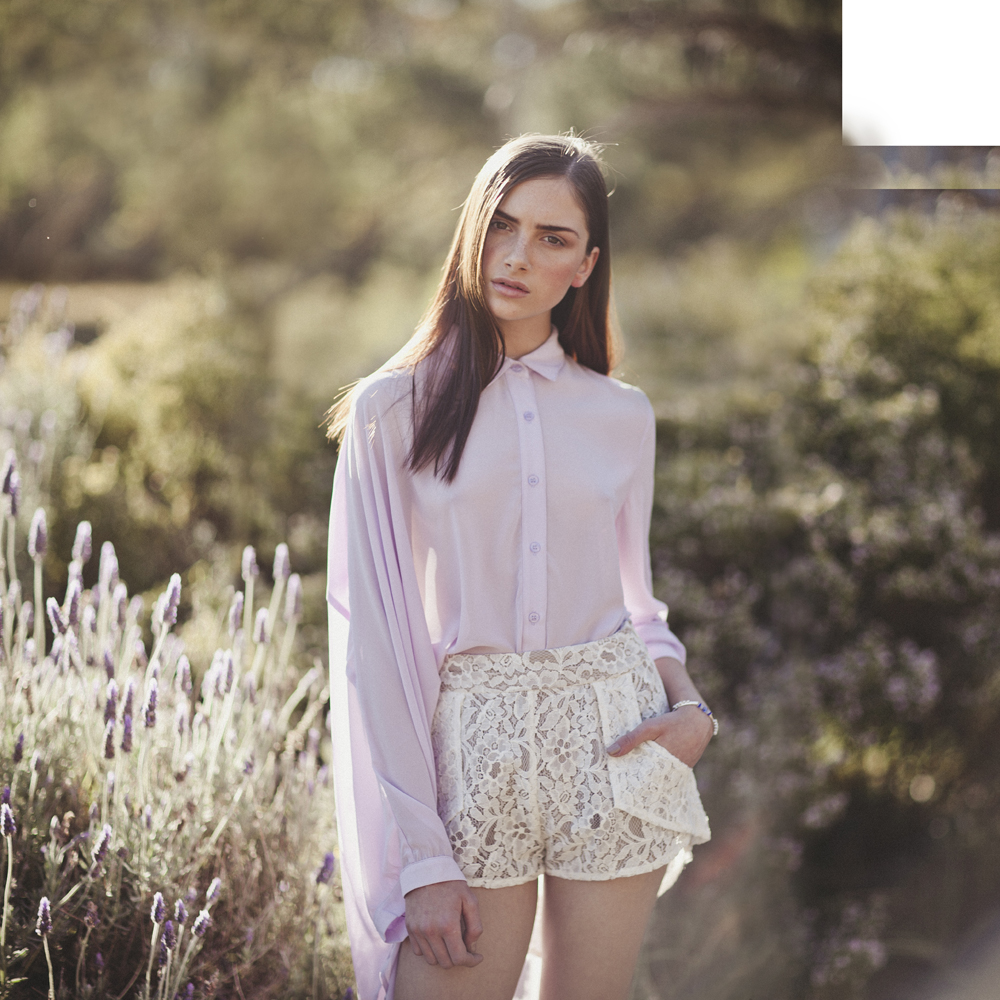
04. The Stitching Continues // I continue with the process on focusing on particular areas to expand my image. First I expanded the top left hand corner of blurred colour and texture, next I focused on the lavender field in the bottom left hand corner, then the blurred flower bush in the right corner. Finally I added some more blurred bokeh tree to cover the structure that was distracting in the background of the top right hand corner.
There are no real shortcuts to expanding images like this. It takes a lot of patience to find the right sections that you can copy from other pictures to blend into the one you're working on. After about an hours worth of work, I was finished!

05. Subtle Details // Once I saw my image expanded as a whole, I could start getting creative with the extra details. The first thing I added is very subtle but I thought added a nice touch. I used a large, soft brush at an opacity of about 5% and painted with a solid white colour in the bottom of the right hand corner. This was to add to the washed out back-lit look of the photo.
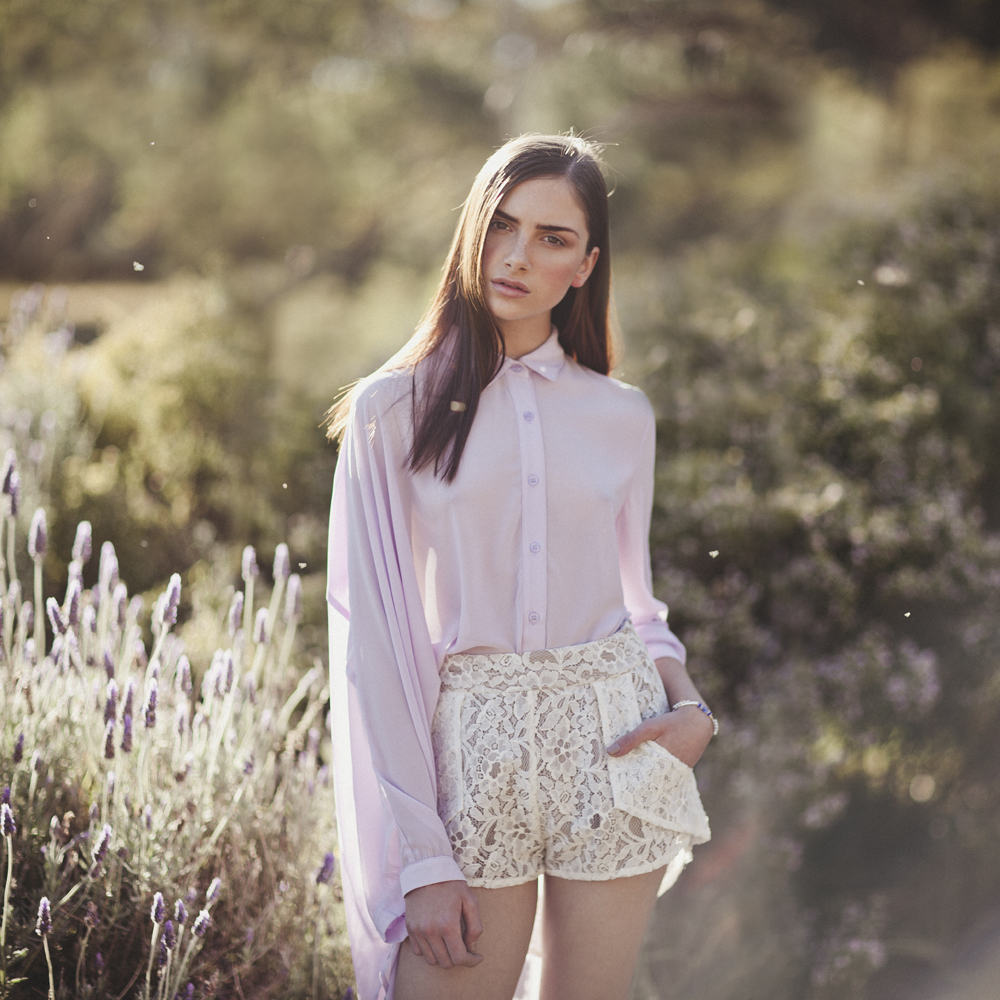
06. Adding the Bugs // During this shoot, I photographed some closeups of Elle in front of a lavender bush and there were hundreds of little bugs flying around catching the light around her which I thought was a lovely addition to the photo. I really wanted to add that aspect to this image I was working on, so I collected a few different bugs from those close up portraits and added them to this picture. I made sure to add a variety of these bugs - some are in focus, some are on her hair or over her clothes and some are blurred out from the depth of field.
Just like the background images I used for the expansion, I also applied the same Lightroom presets to the bug portraits to make sure they would fit in to the picture. I then selected the individual bugs with the Lasso tool and with a layer mask and a soft brush, painted out the background until they blended in and looked natural.

07. Adding Light Leaks & Final Colour Grading // One of the last details I want to add to the image is another light leak, this time opposite to the first one I added. I create a new layer, select a vibrant yellow/orange colour in my palette, then use the Gradient Tool set to a Radial Gradient to create a circle on the top left hand side of the image. I set the layer to Screen and lower the opacity until the light leak blends in.
The final step I take in editing an expansion is one last colour grade. I first colour grade the image in sections. I use the Lasso Tool to make a selection around Elle and set the feather to 200, then use the RGB Curves tool to increase the contrast and tweak the colours. I also colour the blurred flower bush to the right of the image on it's own as well as the lavender bush. I then create one last RGB Curve layer to colour the image overall and we're done!

And here's a little fun GIF I want to leave you with of all the process images I saved throughout my editing! Please leave a comment letting me know what you think and if you'd like to see more blog posts like this.

If you would like to see more tutorials, please check out my Digital Film Actions Blog which is updated twice a week, as well as my YouTube Channel - also updated weekly with tutorials and daily with vlogs!