
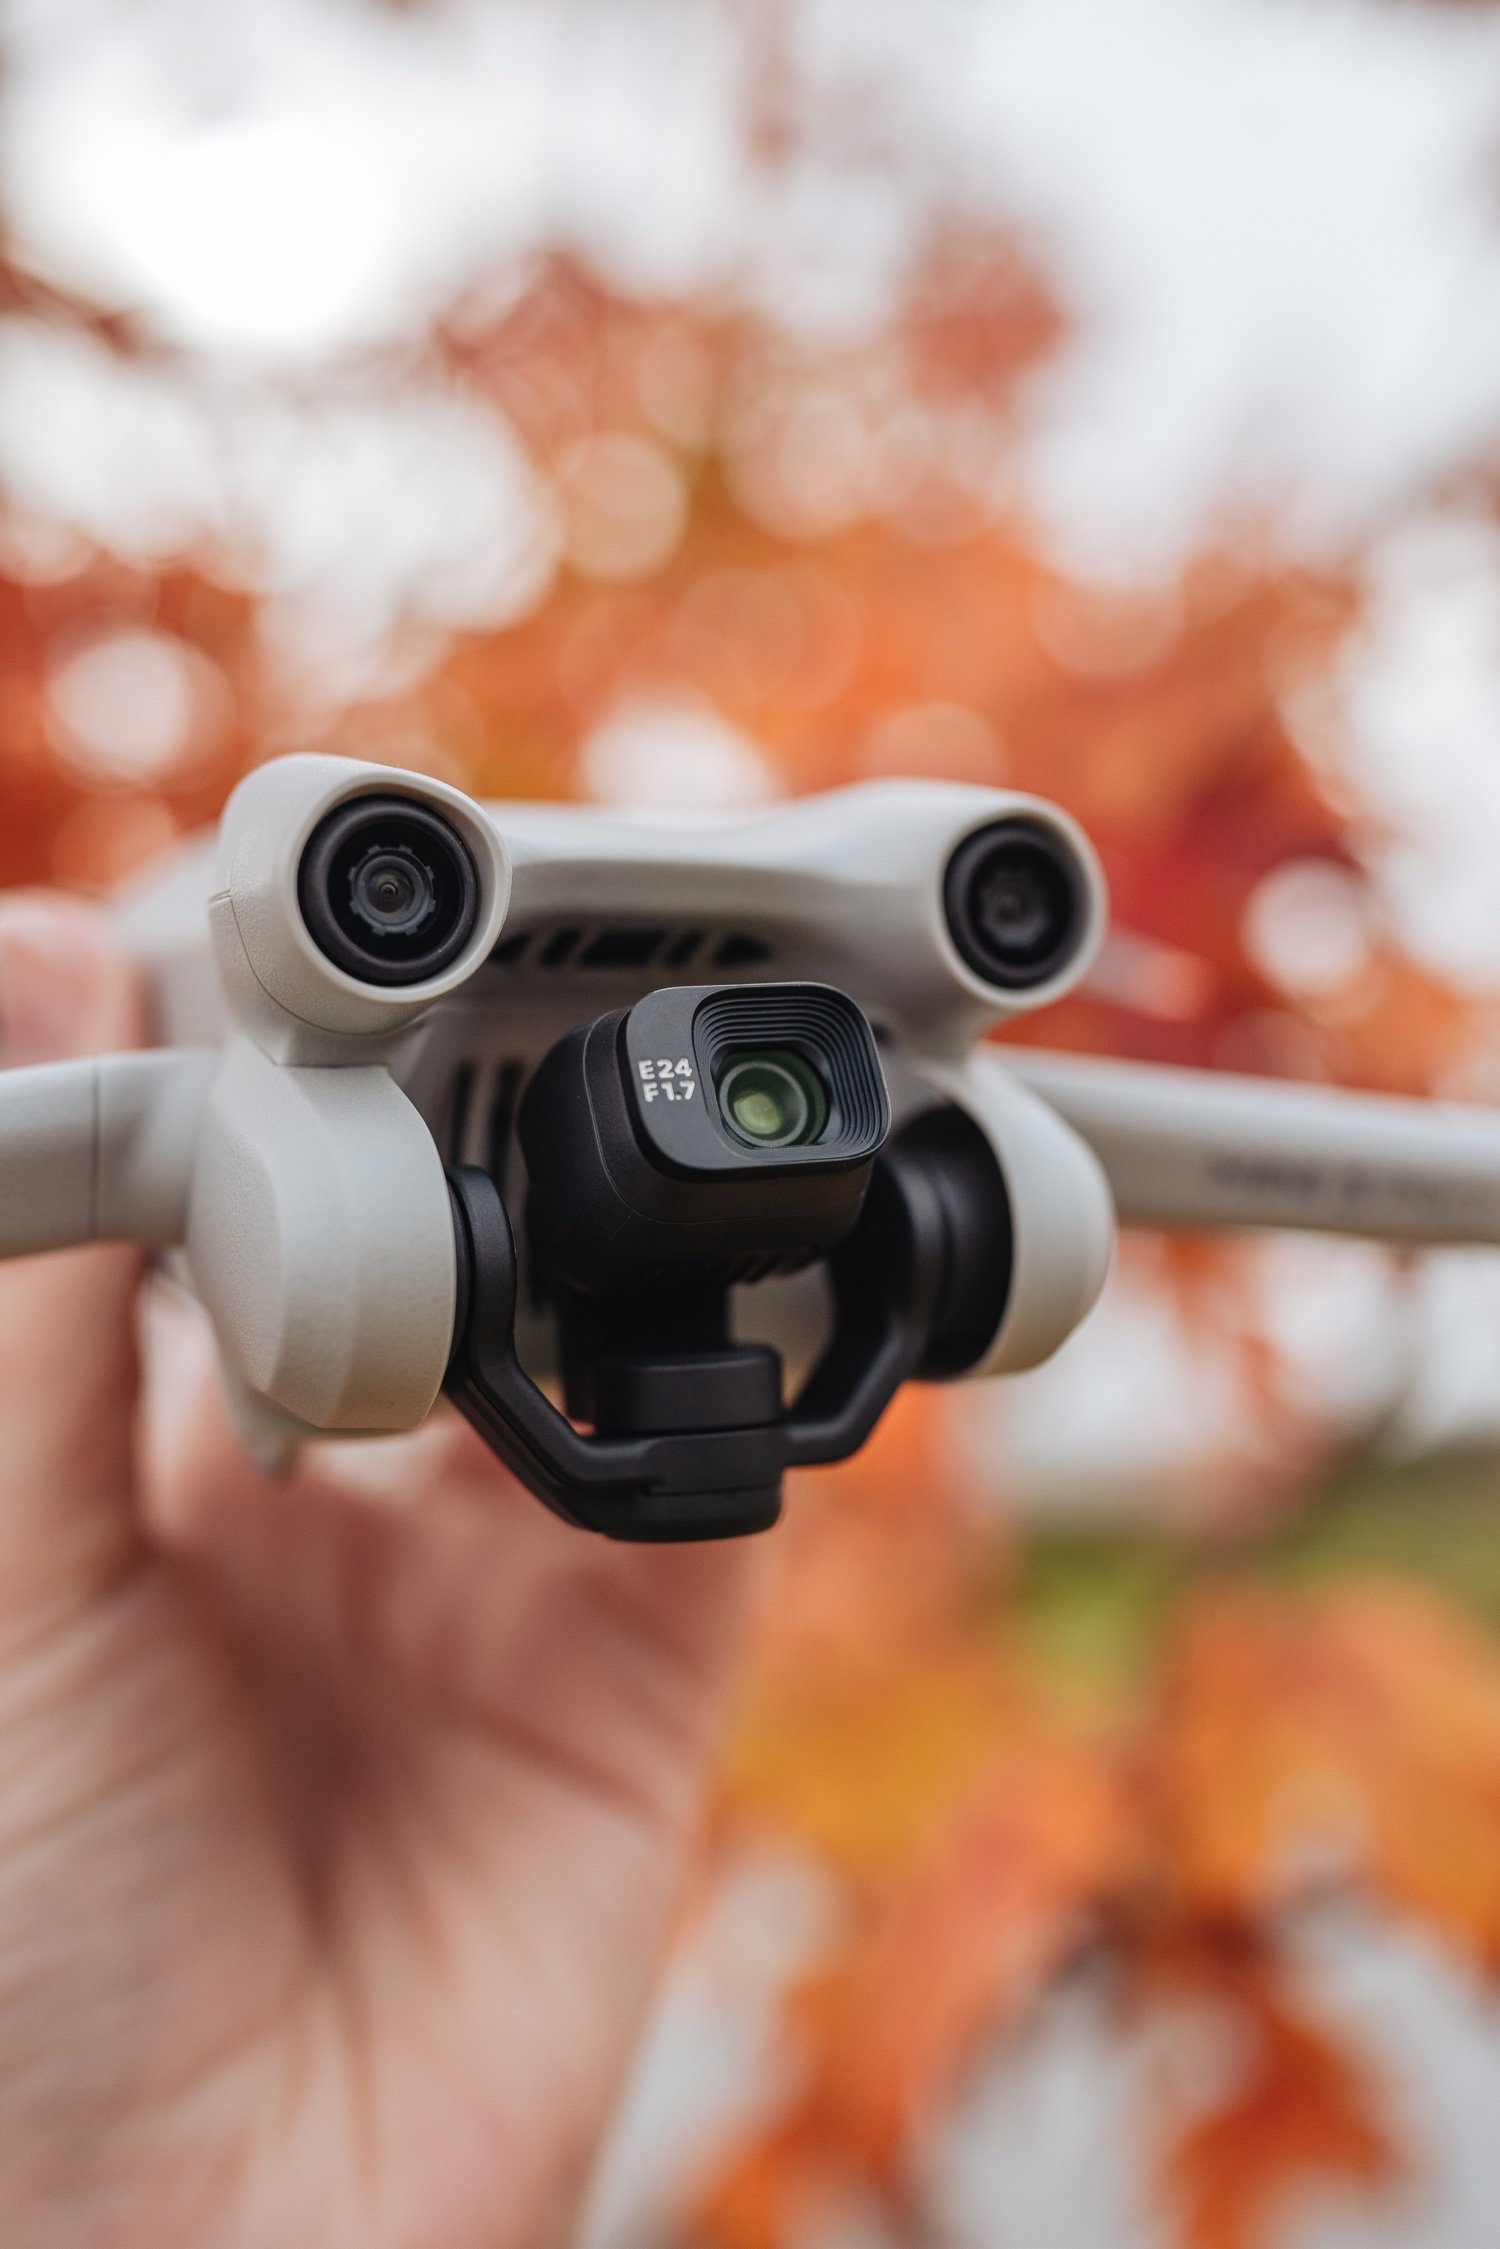
The Mini 3 Pro has a 1/1.3 inch sensor. It has a 48 megapixel camera with a 6.7mm f1.7 fixed aperture lens which is the full frame equivalent of 24mm. In video, we can record 1080p and 4K footage in 25, 30, 50 and 60p. This is an improvement from the Mini 2 where you could only film those frame rates at 2.7K. The Mini 3 Pro also features 120fps in 1080p.
Watch my review video below to see unedited 4K footage examples of the Mini 3 Pro. I flew this drone in a few locations to see what the footage looks like with various landscape colours and at different times of days. It was fun getting to show off some of my favourite locations in NSW! Featured in the video includes the Blue Mountains on a foggy day, Sydney beaches on a sunny day and the autumn colours of Mt Wilson.
WHAT’S IN THE BOX + WIND RESISTANCE
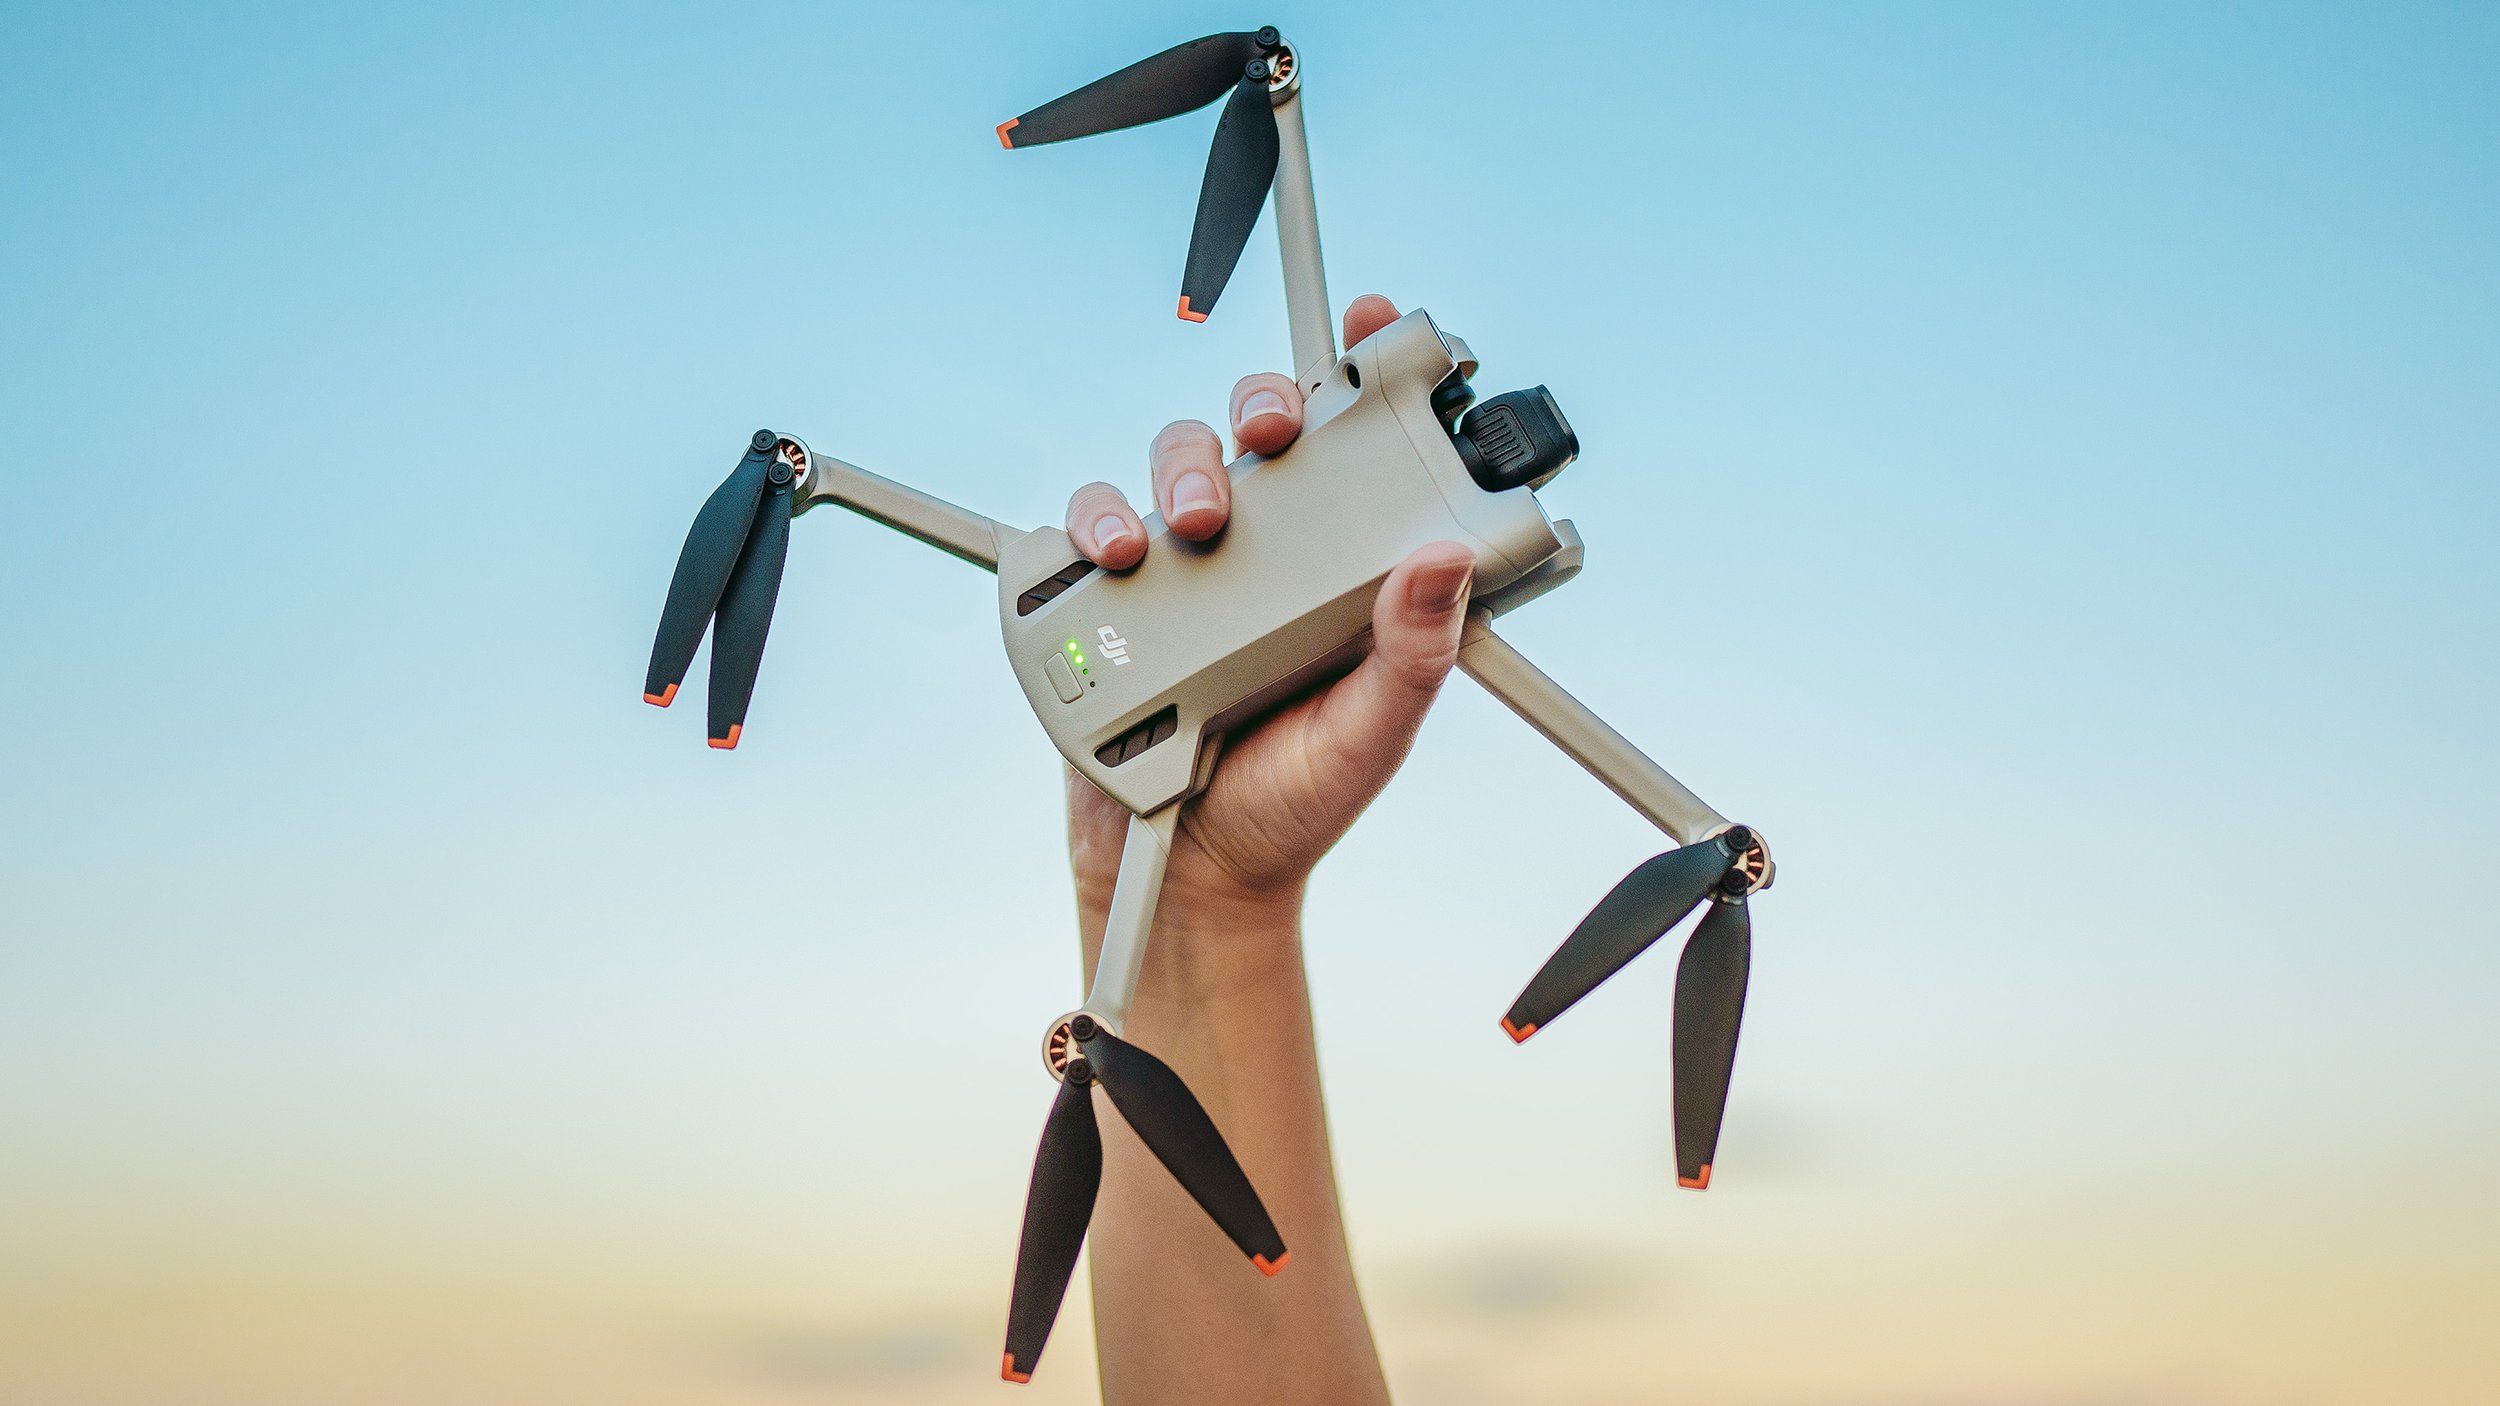
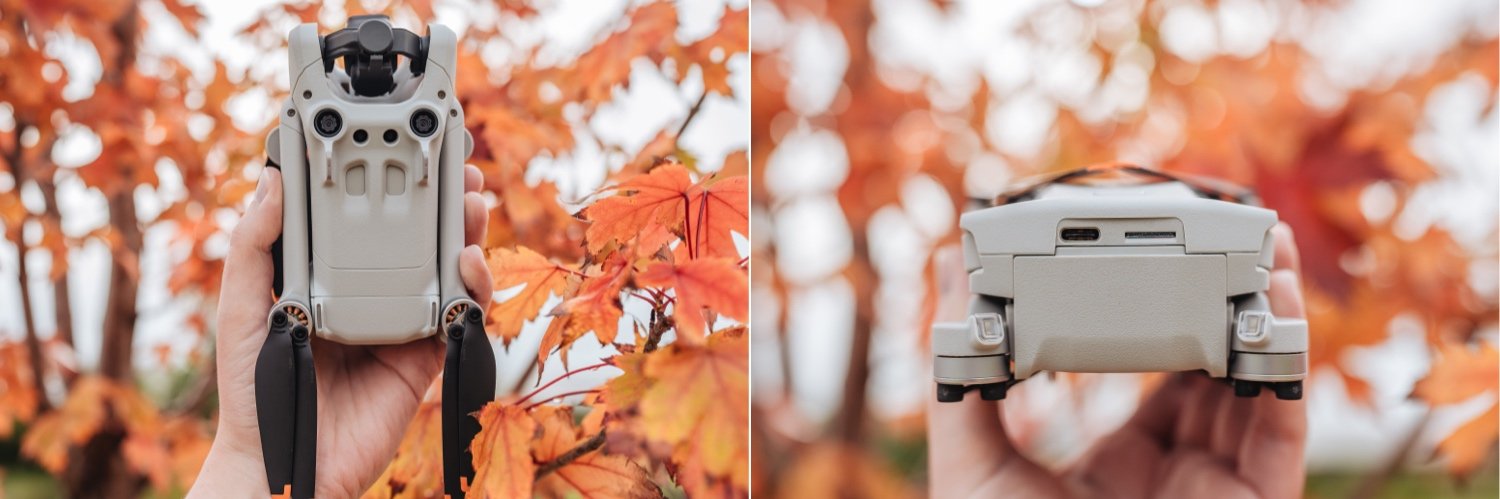
The Mini 3 Pro includes a standard battery, keeping the drone at 249 grams. You can fly up to 34 minutes with this battery. You can also get higher capacity batteries that allow you to fly up to 47 minutes with the Fly More Kit Plus. This brings the weight of the drone to 289 grams.
Product Versions:
DJI Mini 3 Pro Standalone (no RC)
DJI Mini 3 Pro + RC-N1 Controller Combo
DJI Mini 3 Pro + New DJI RC Controller Combo
Accessories:
Fly More Kit (x2 standard batteries, x1 charger, x2 propellers, x1 backpack)
Fly More Kit Plus (x2 batteries plus, x1 charger, x2 propellers, x1 backpack)
Battery options: Standard intelligent flight battery and Intelligent flight battery plus
During my review video, I am using the Fly More Kit Plus. I enjoy using the higher capacity battery as I like to take my time capturing photos and video during a single flight. I found the 34 minute flight time of the standard battery was fine as well. I did not feel rushed capturing my shots with either battery.
The Mini 3 Pro has up to 10.5 meters per second wind resistance. It was pretty breezy during the mountains and both beach locations I shot at. I share examples in my review video of the wind resistance with the drone hanging in one spot. I also share sped up footage of the drone flight forward at the windy beach location.
All the footage shown in my review video was captured without an ND filter. According to DJI, there will be ND filters available. I can see it's going to have a similar click in system like the DJI Mavic 3.
TRUE VERTICAL MODE
True vertical mode is now available with the Mini 3 Pro in both photo and video! I am extremely excited for this feature. As a photographer, only having the option to take photos in landscape orientation can be creatively limiting. With previous DJI drones, you need to crop your landscape photos to have vertical images. This means you are losing out on resolution with your photos. If you post your drone video to social media, this is also going to be an extremely helpful feature. Instead of having to crop your landscape video to portrait, you now have full 4K resolution in vertical mode.
MINI 3 PRO PHOTOGRAPHY
The process of taking a photo with the new Mini 3 Pro RC controller is very intuitive. Just like a DSLR or Mirrorless camera, you half press the photo button to lock focus. Then you fully press the photo button to take the image. There are 2 photo modes available in the Mini 3 Pro: normal photo mode and 48 megapixel photo mode. Normal photo mode captures images 3024x4032 pixels. You would use this mode if you want to capture a few photos quickly as it is faster to save. The 48 megapixel mode captures images 6048x8064 pixels. In my review video I share a side by side comparison of how long it takes each photo to save before the drone is ready to take another. I also take a look at the Mini 3 Pro RAW photo files in Lightroom.
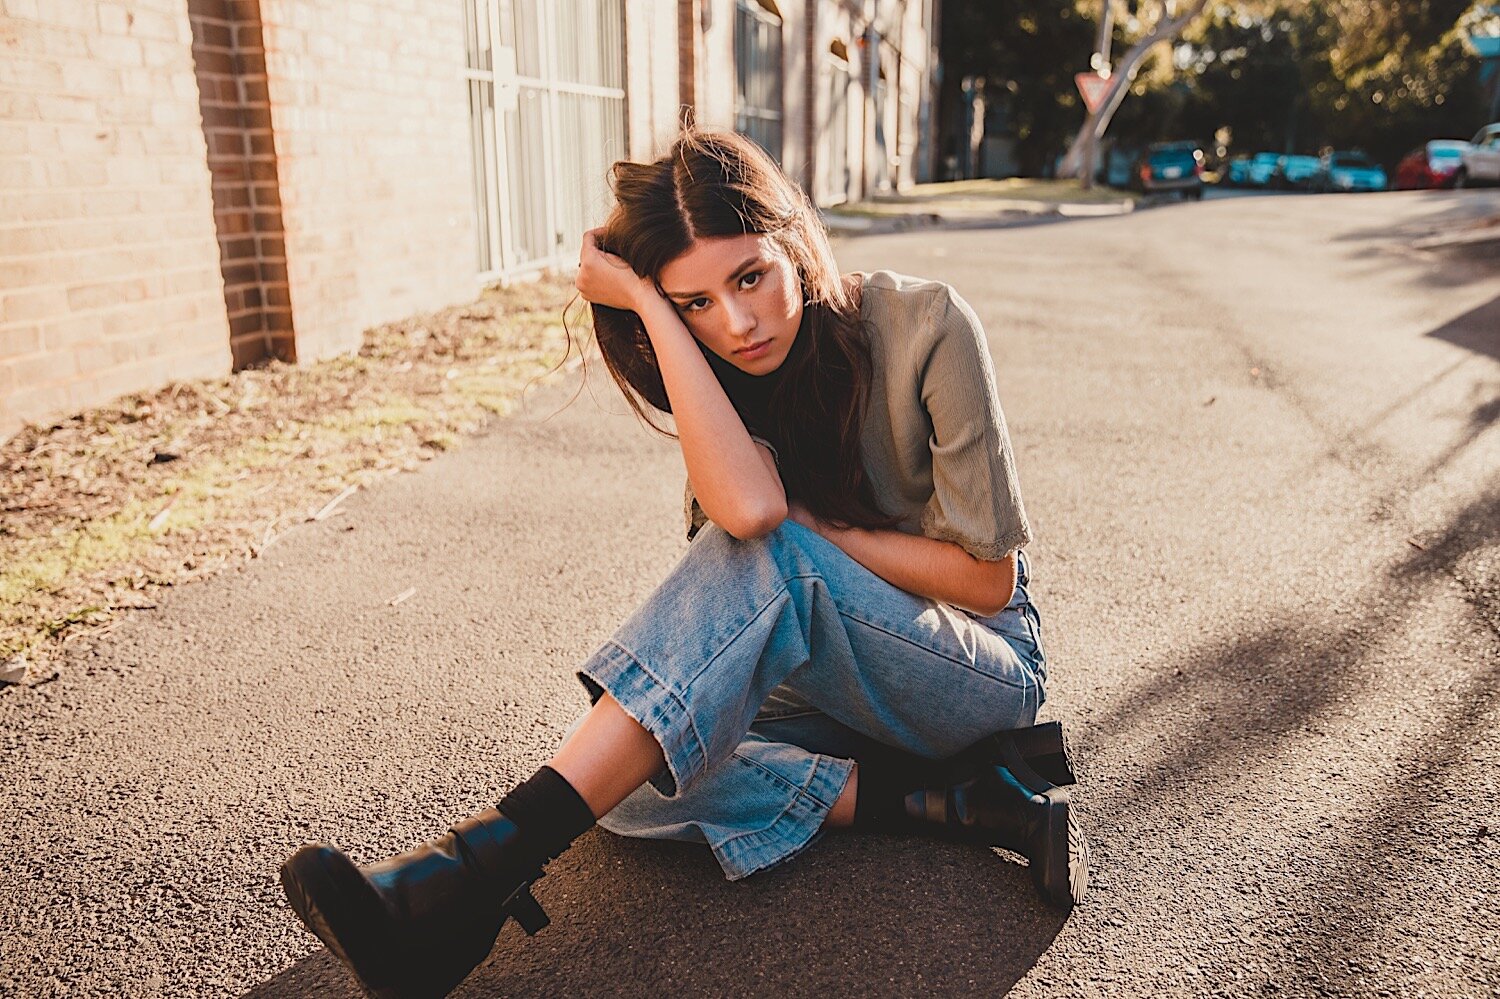
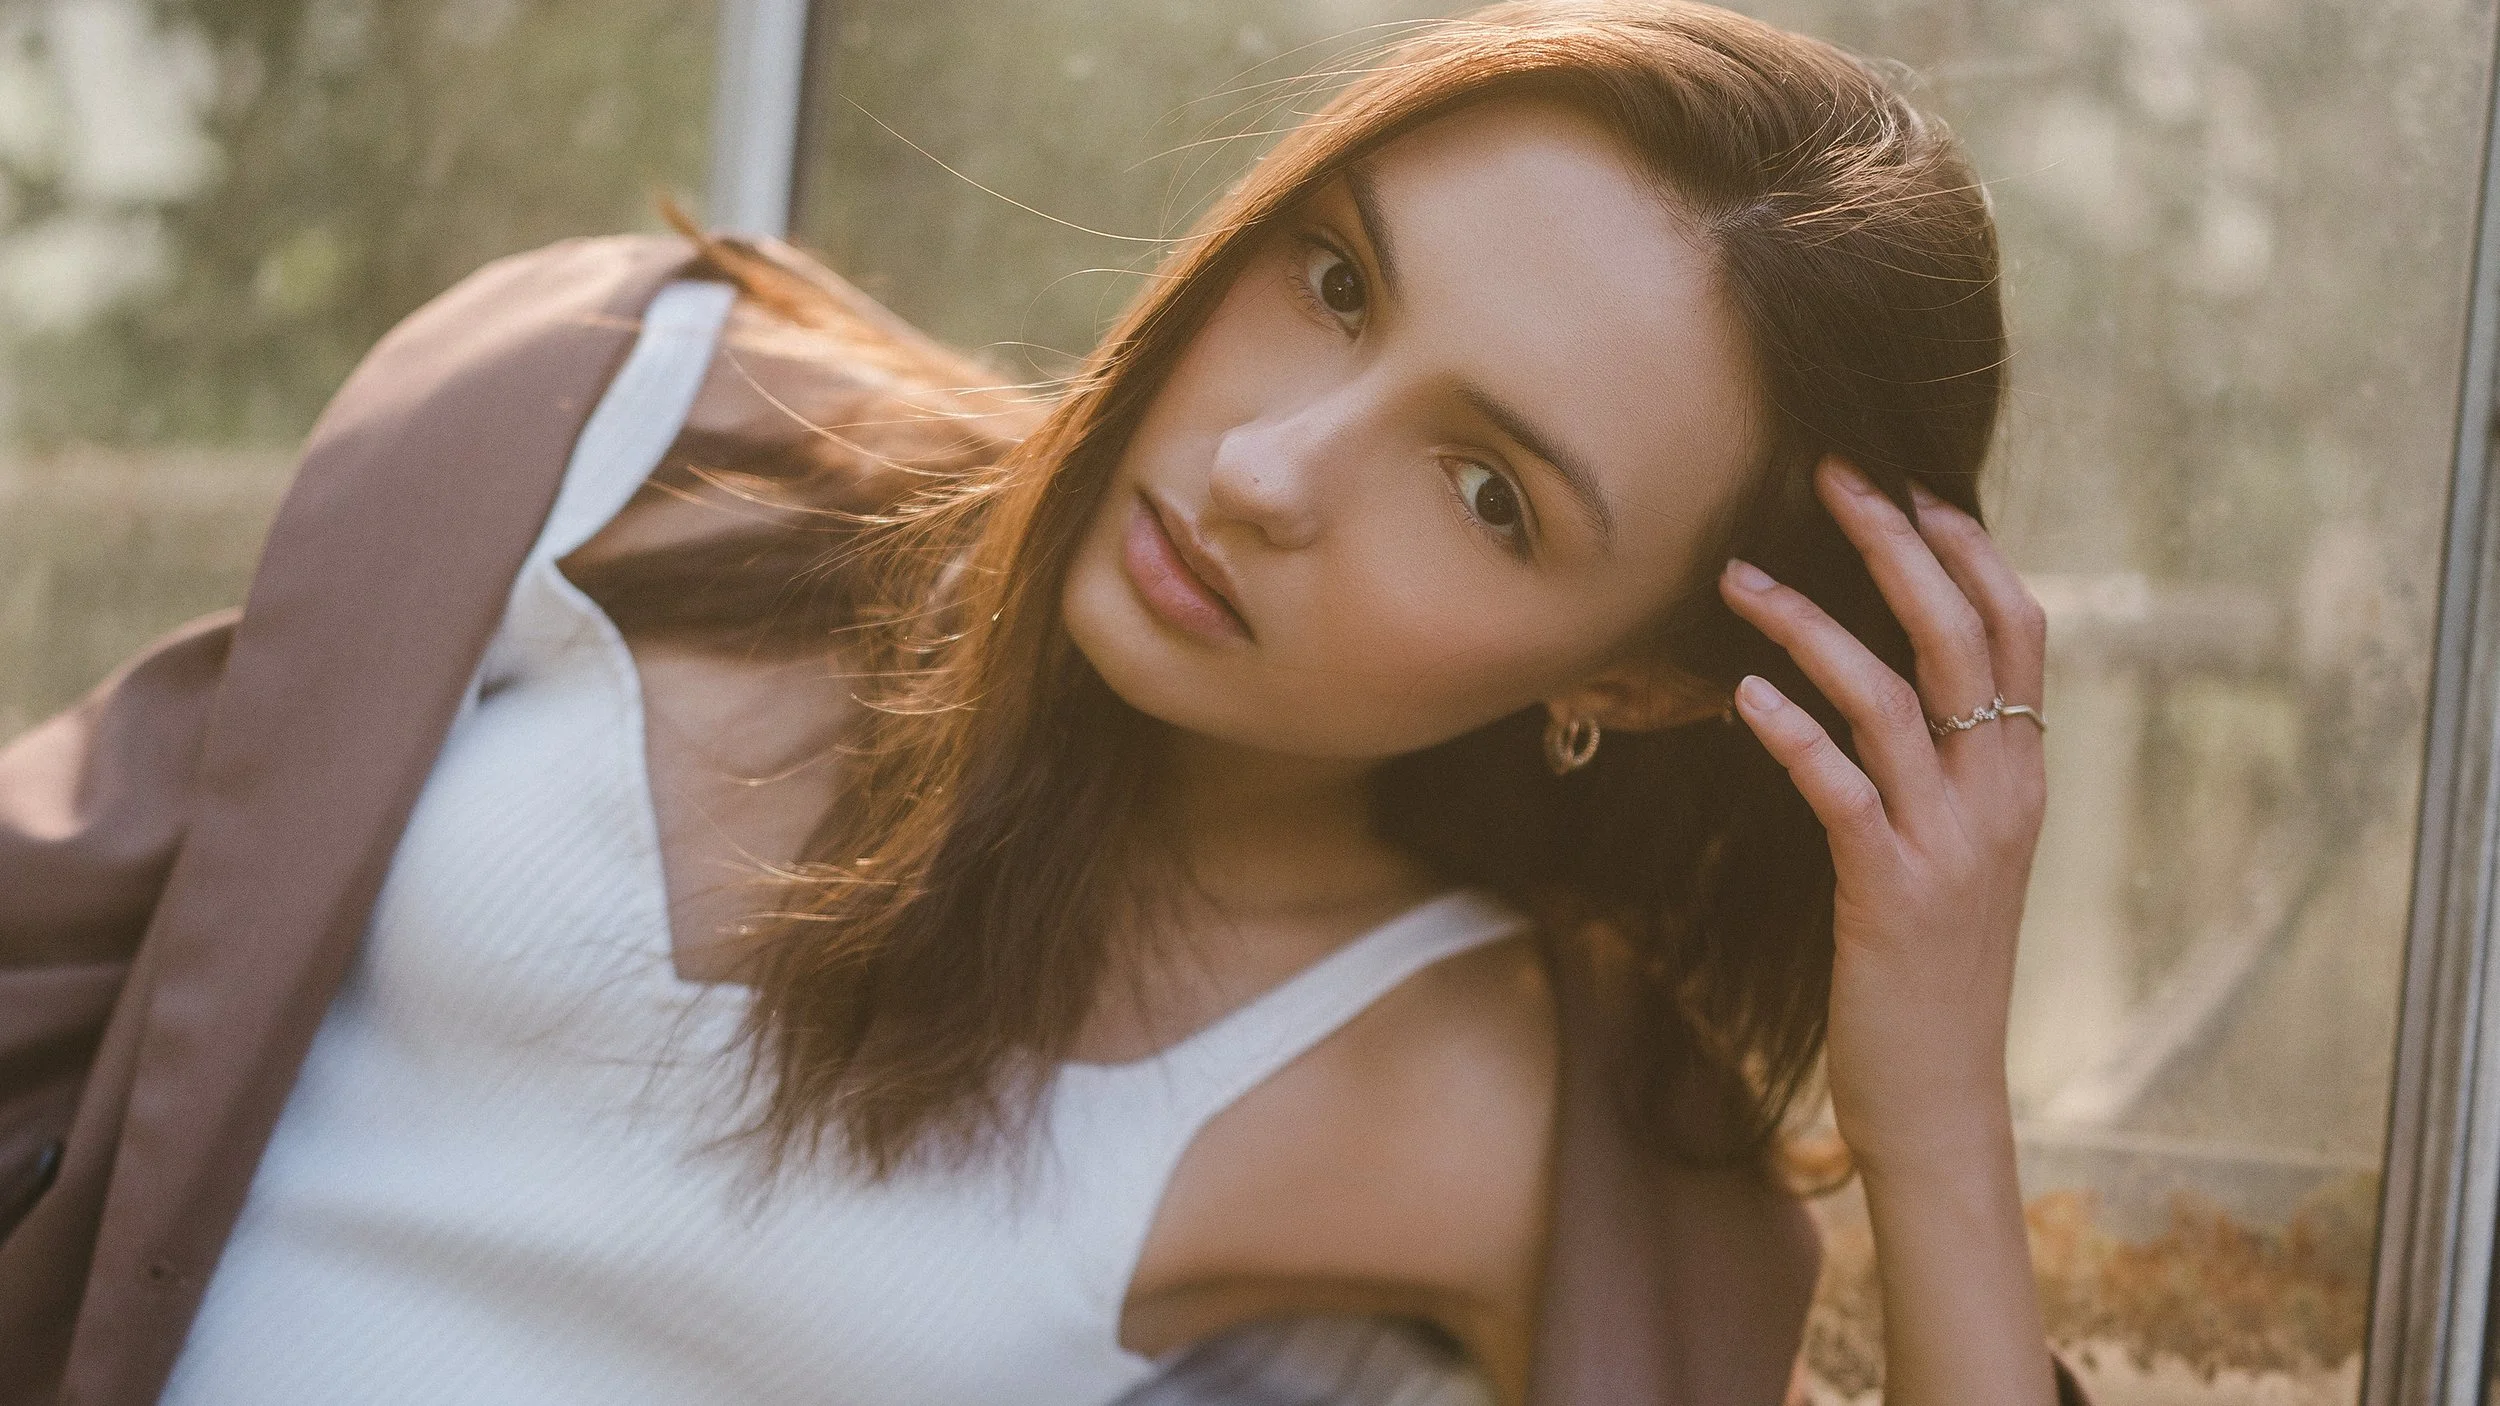
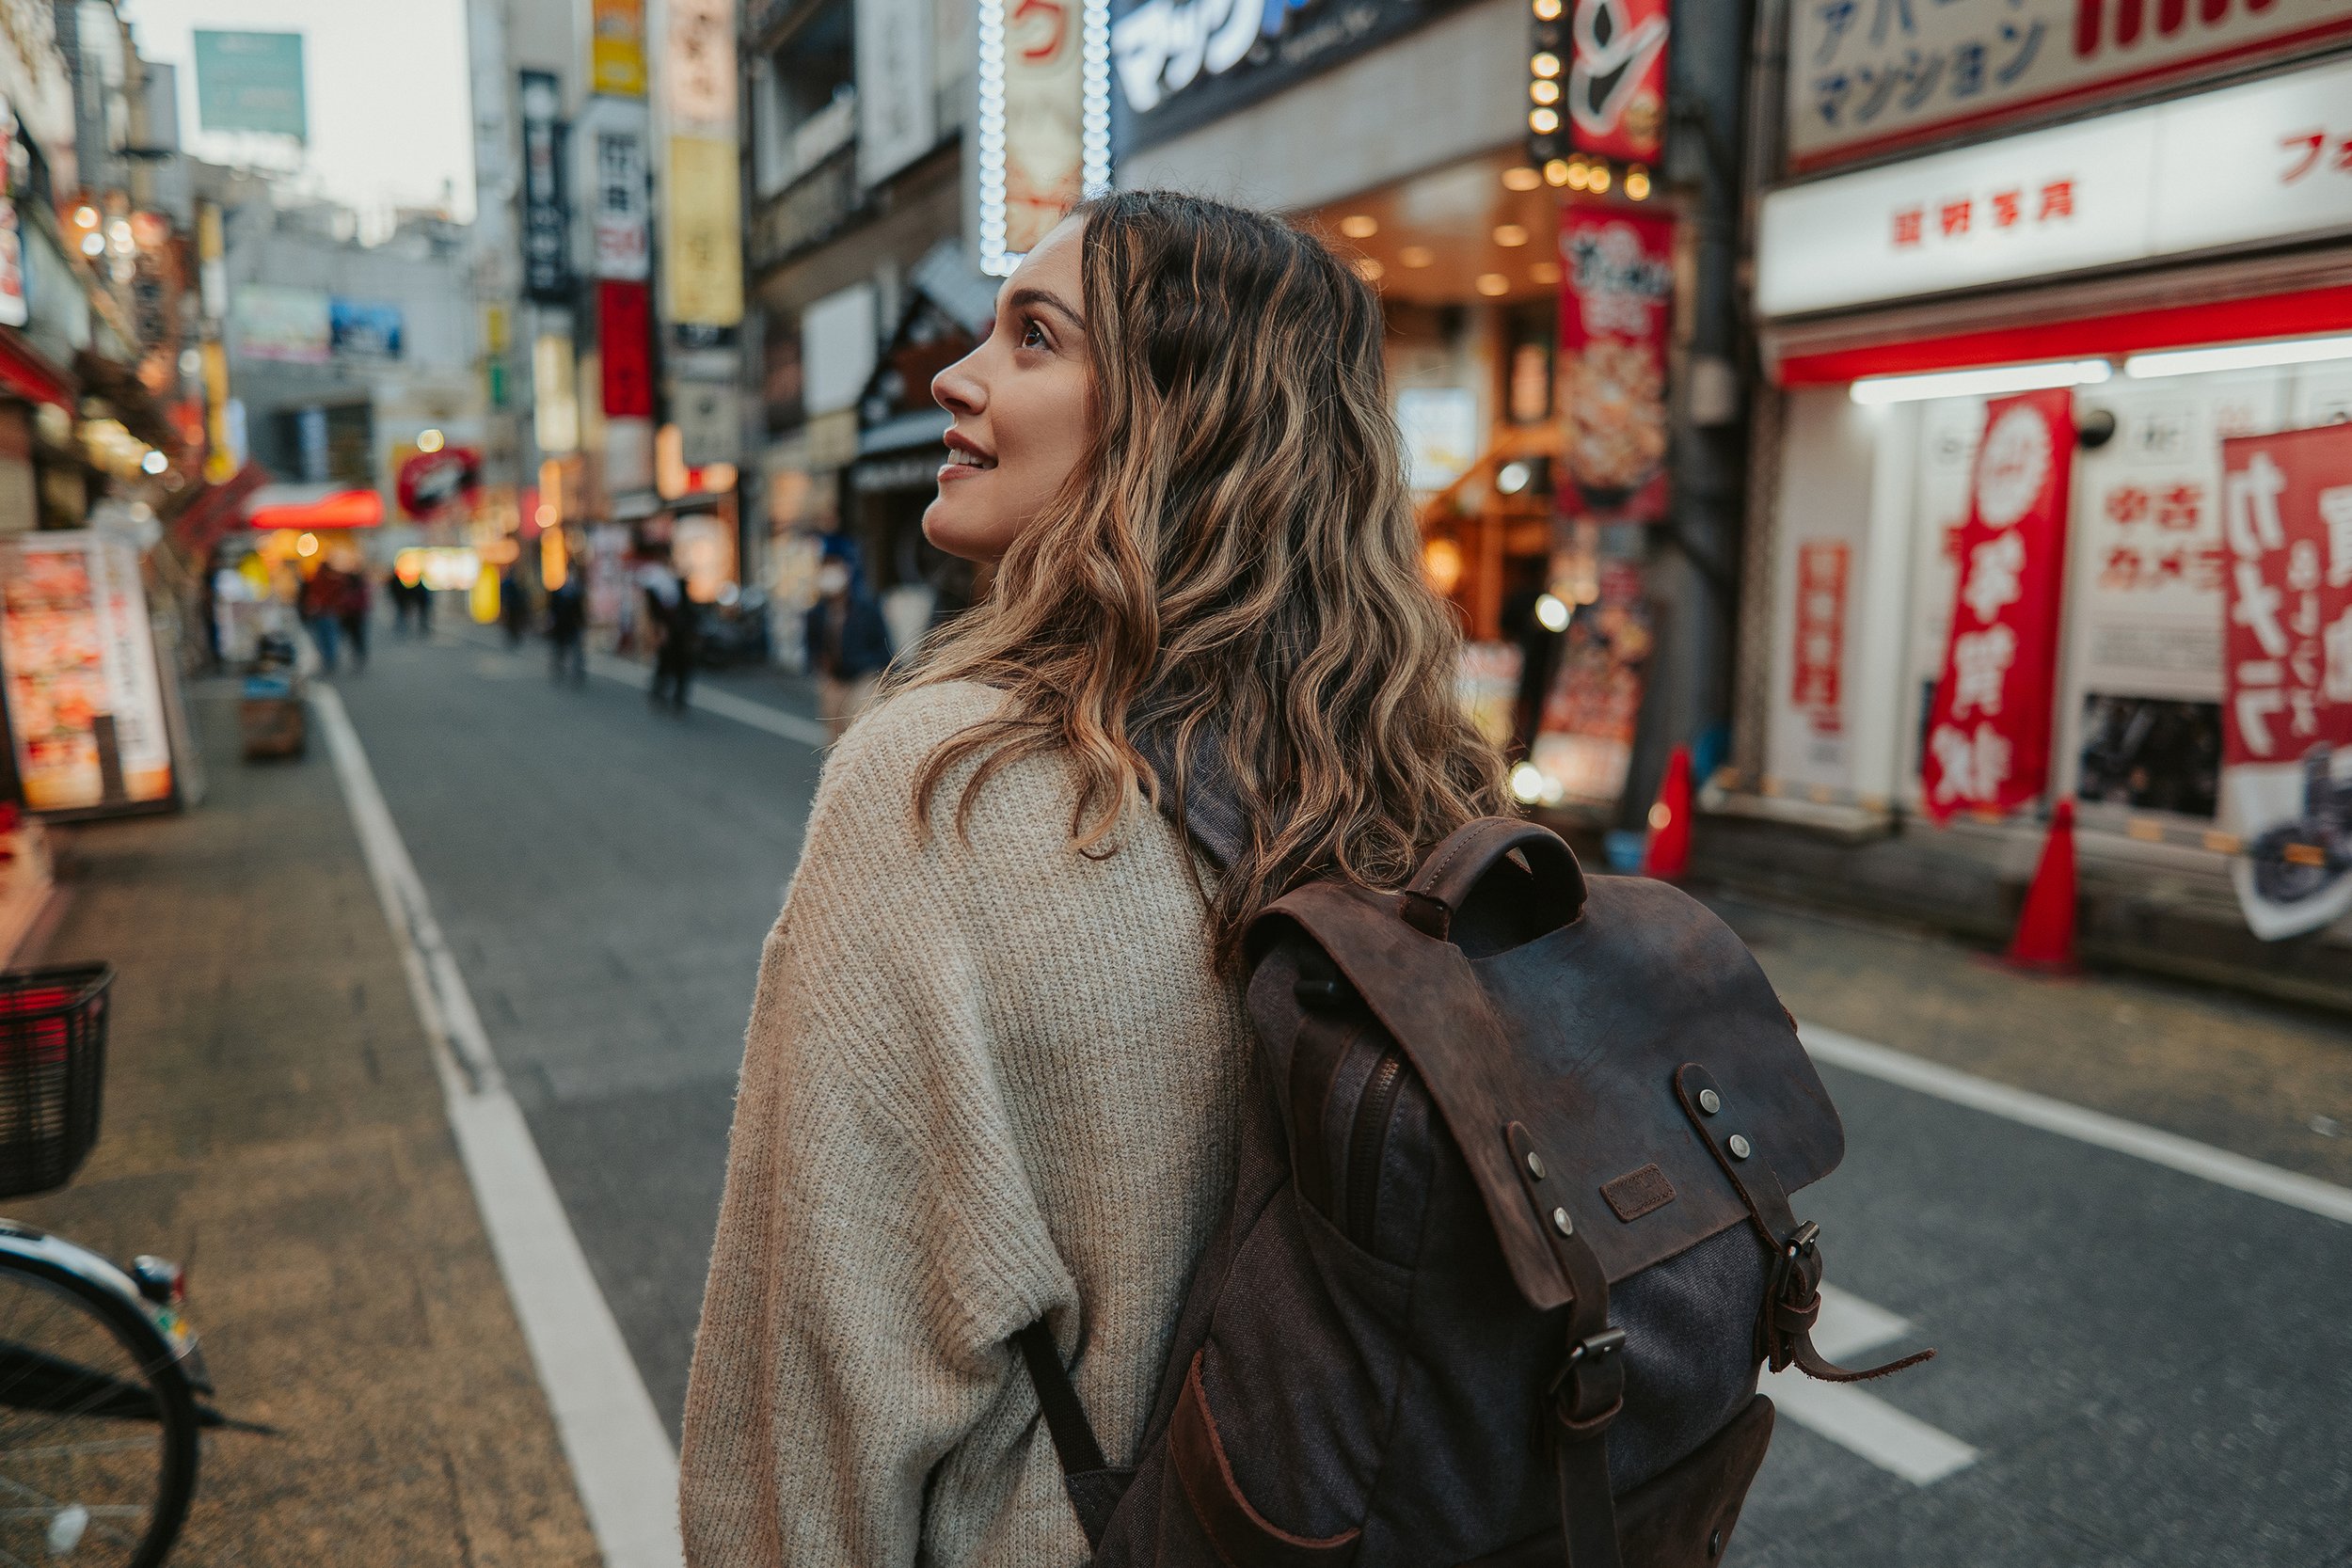
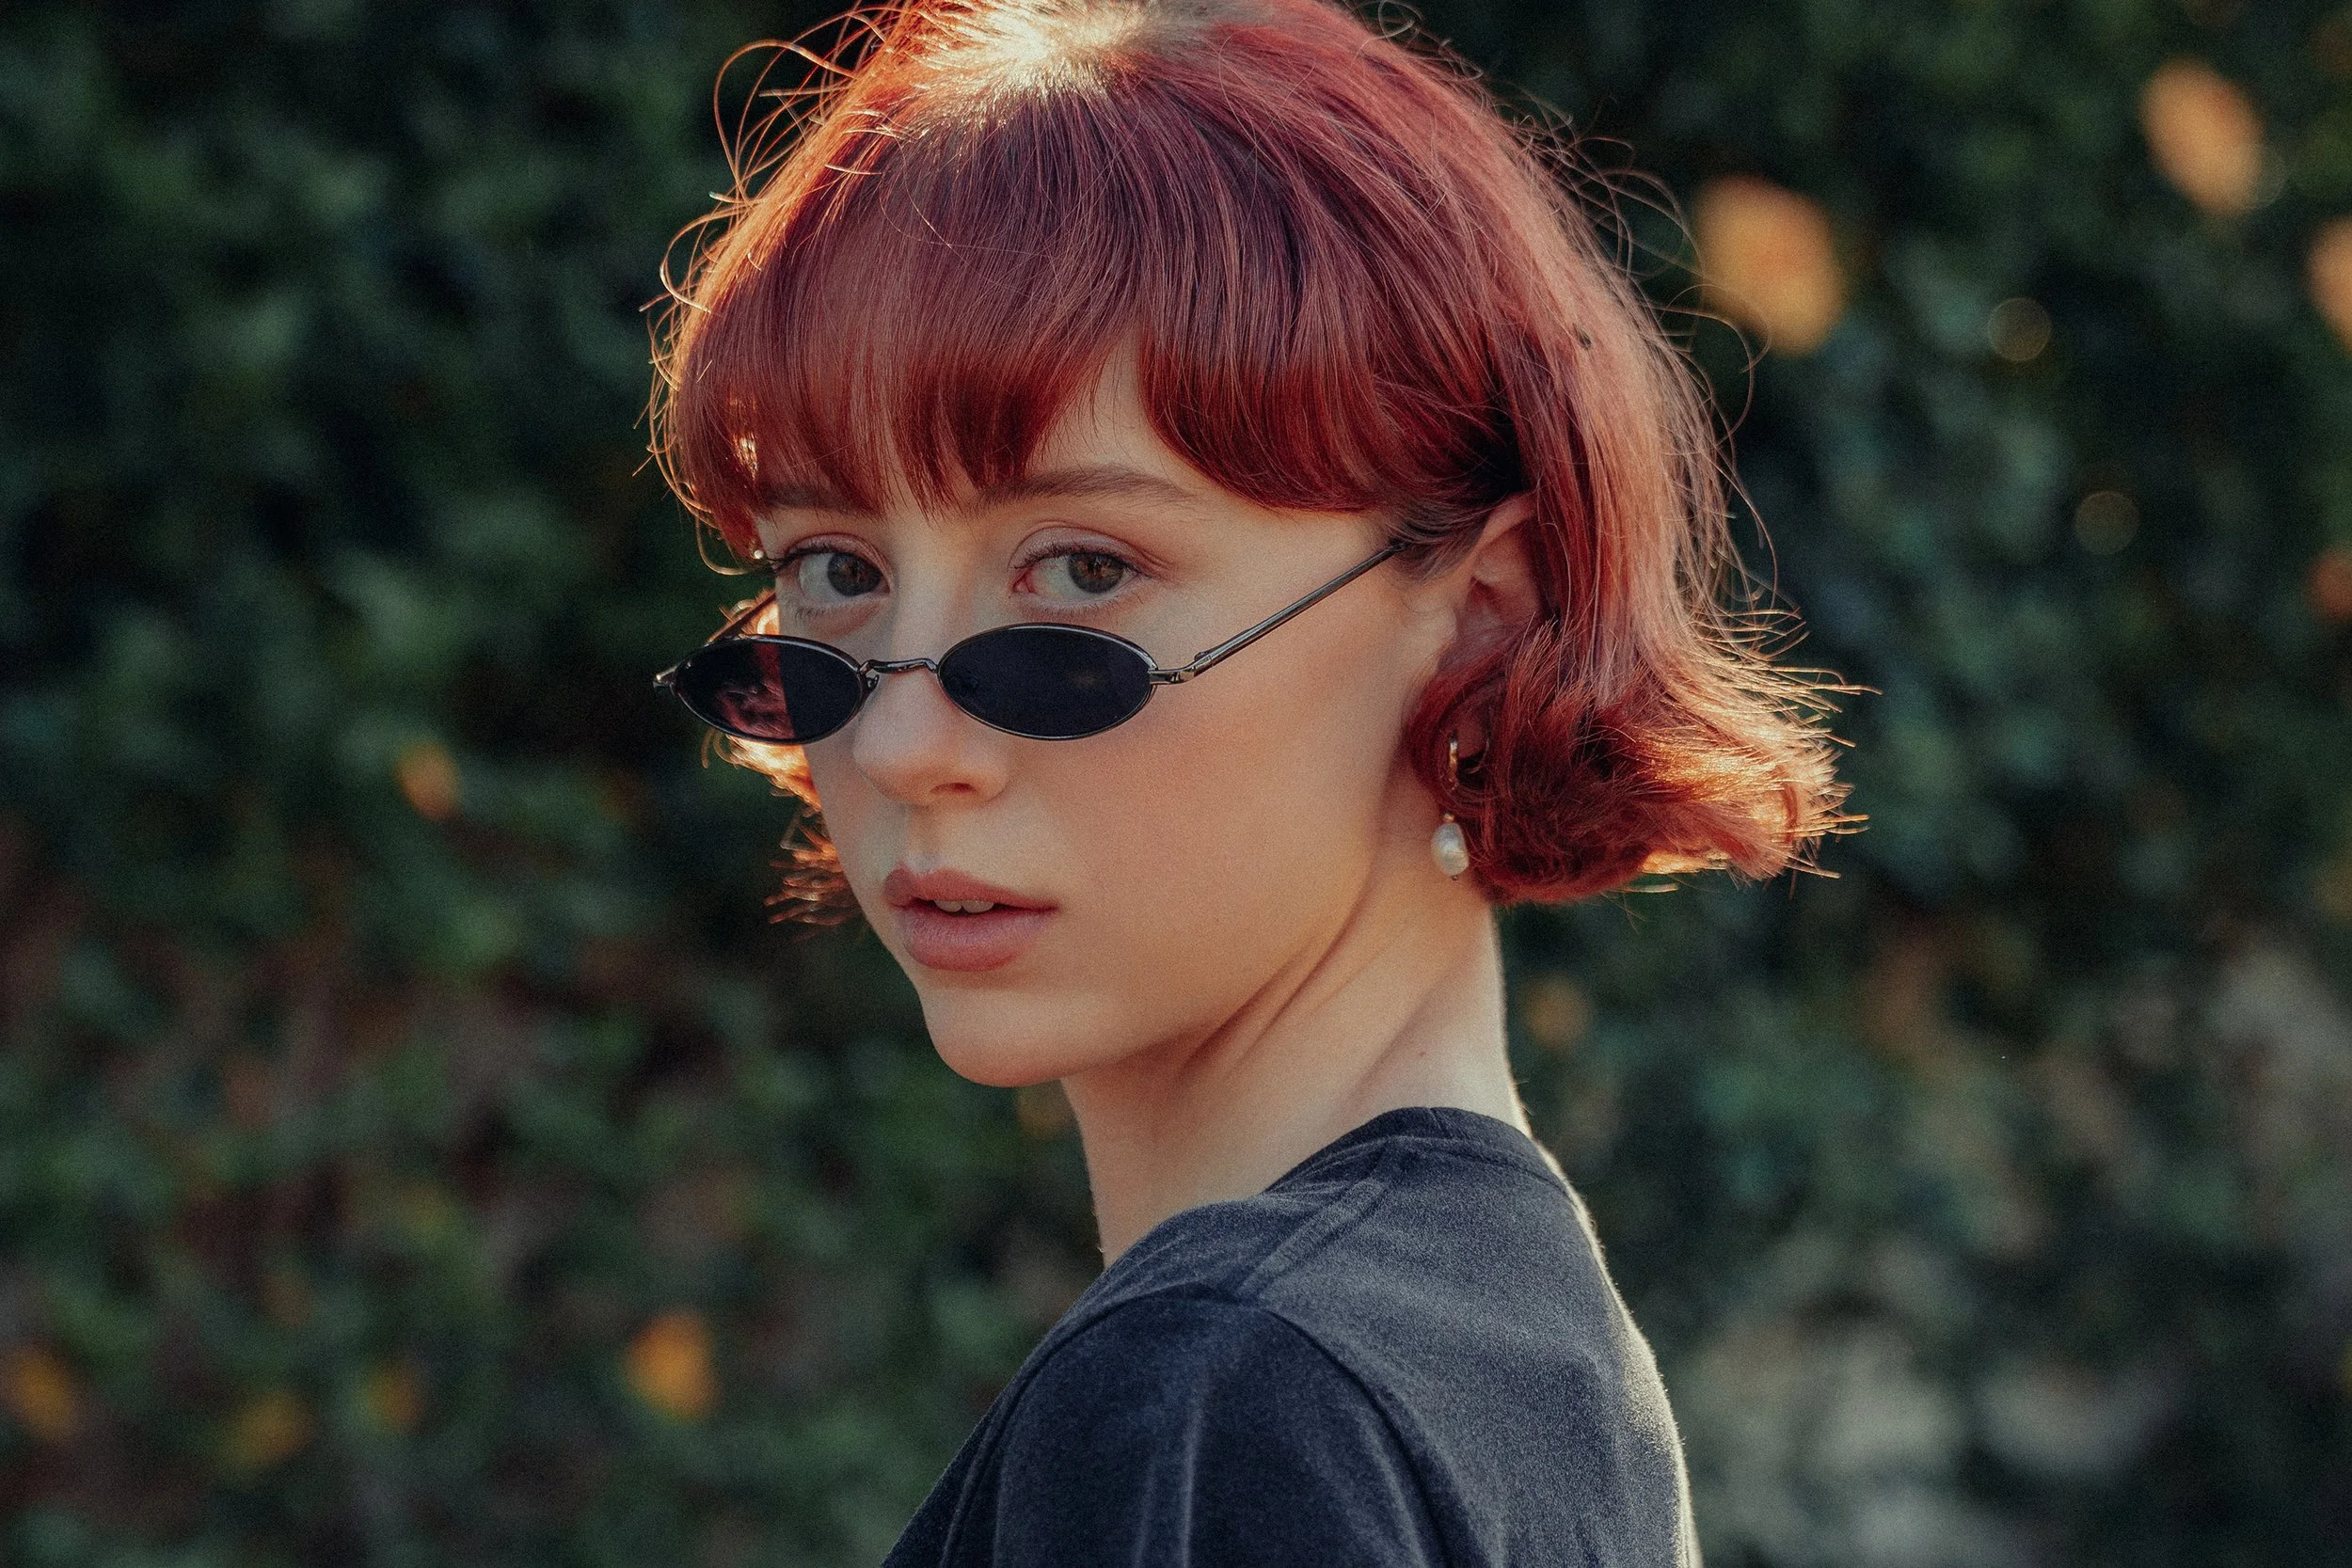
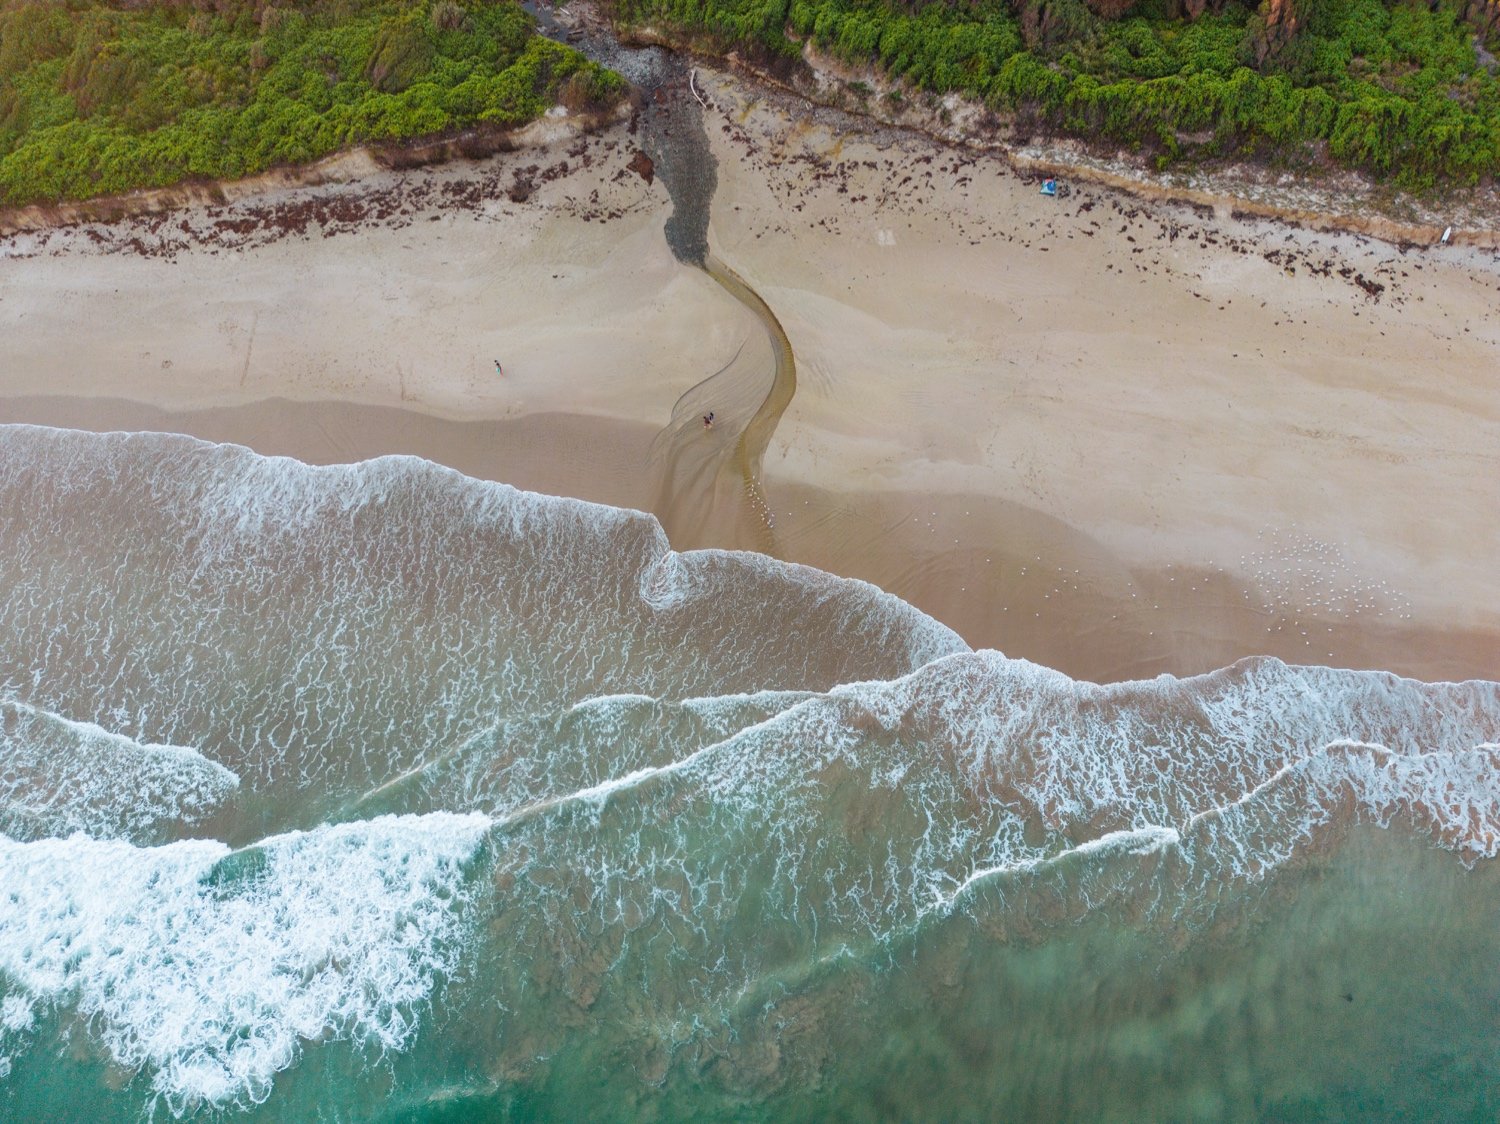
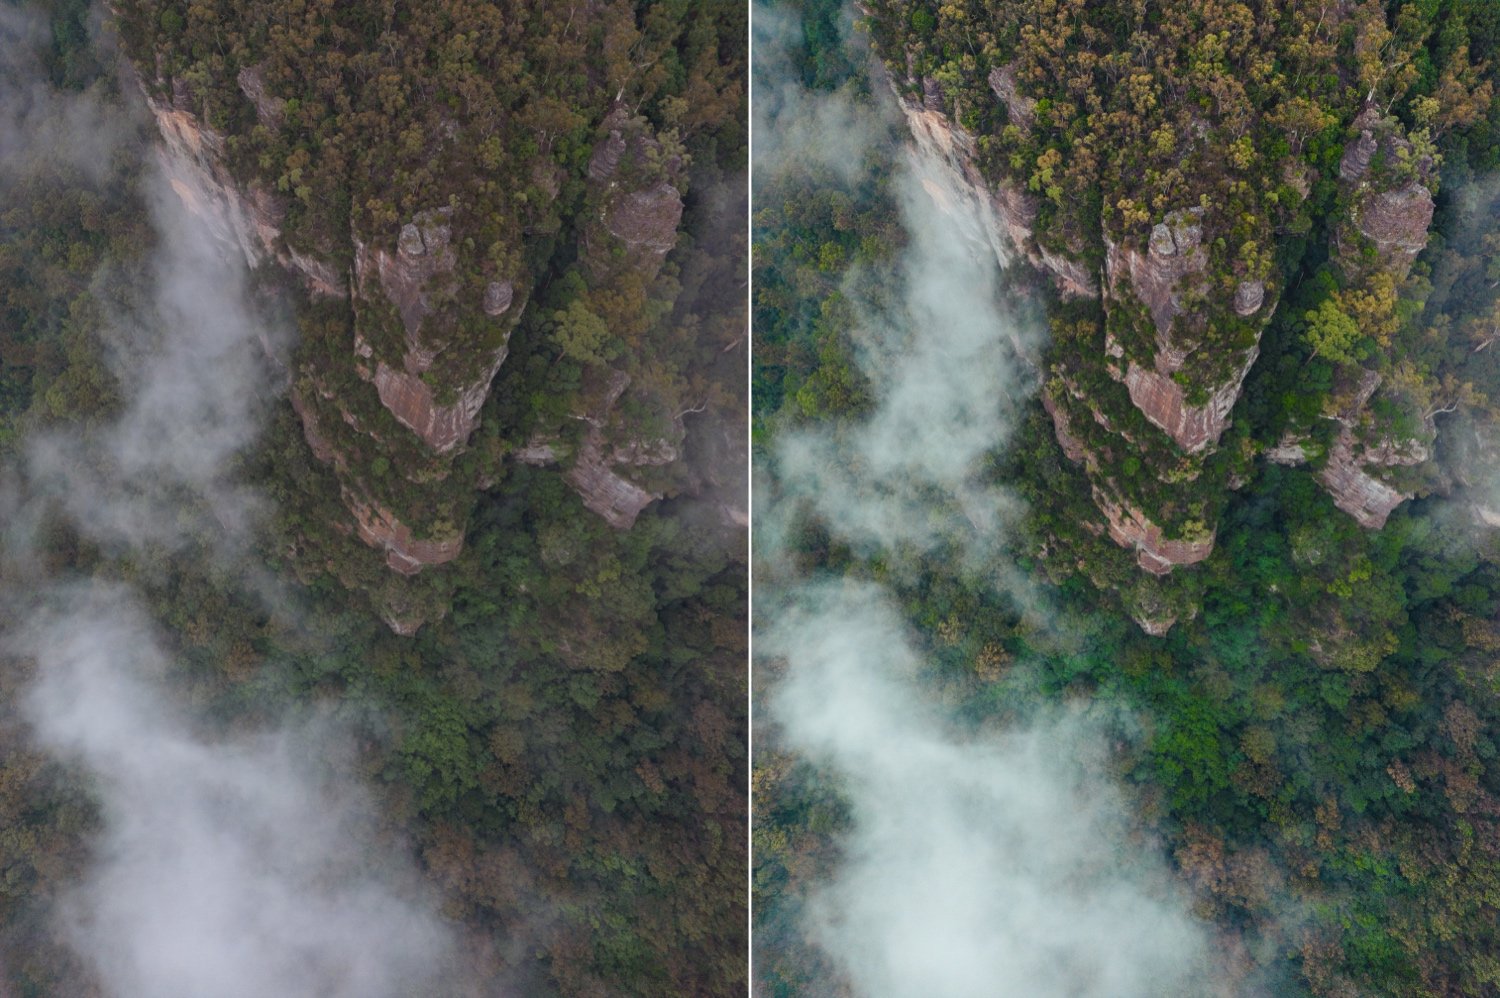
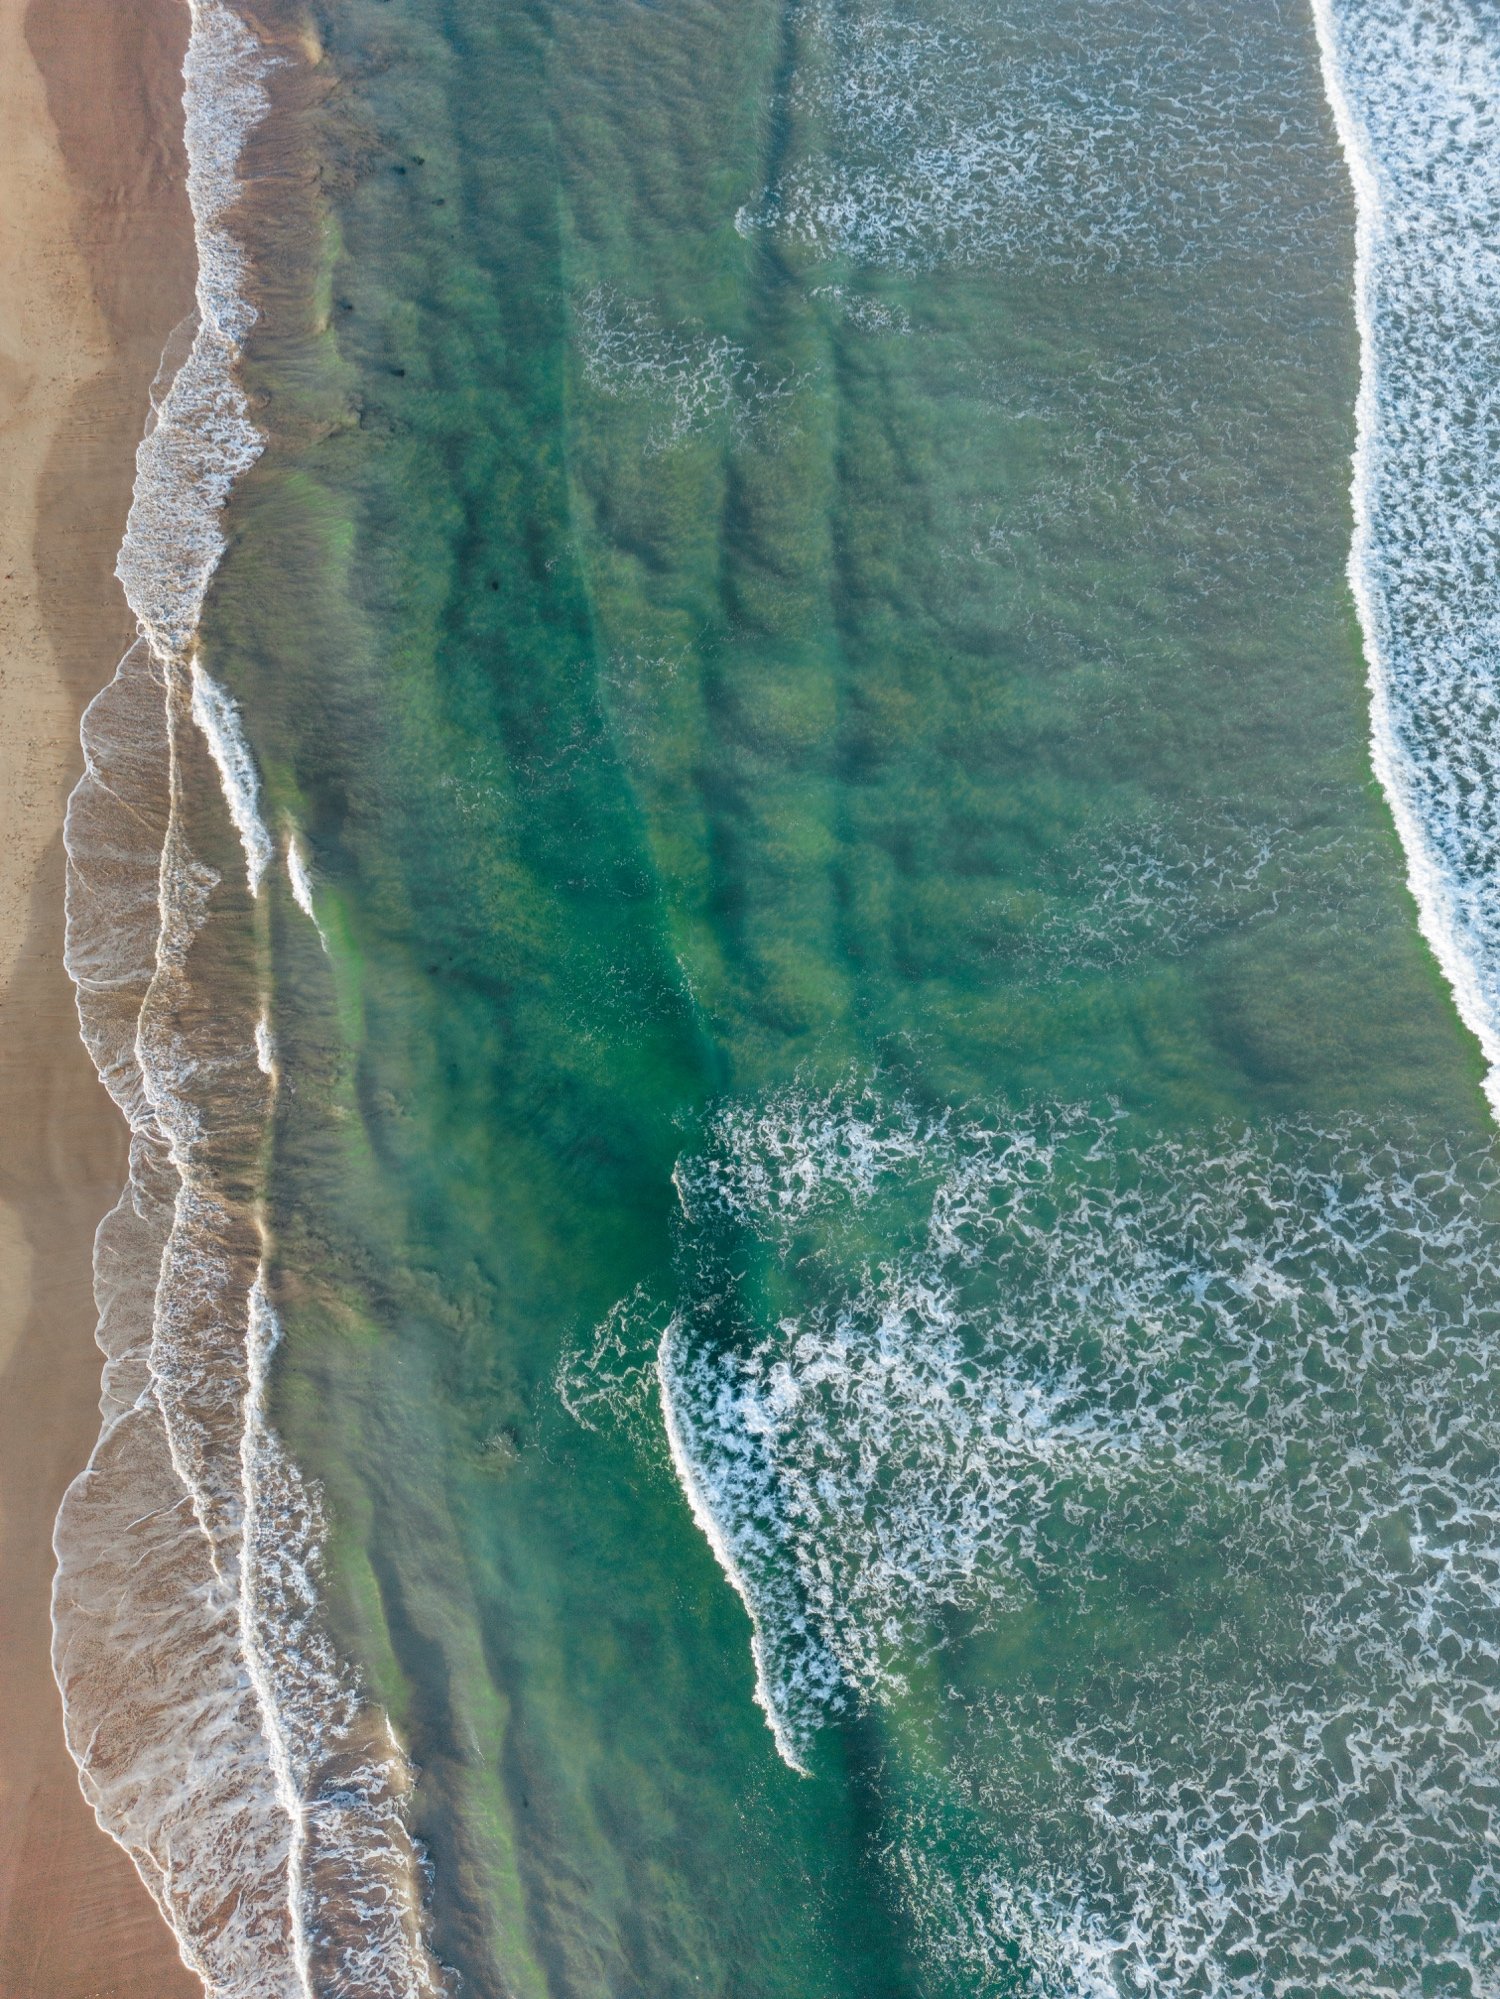
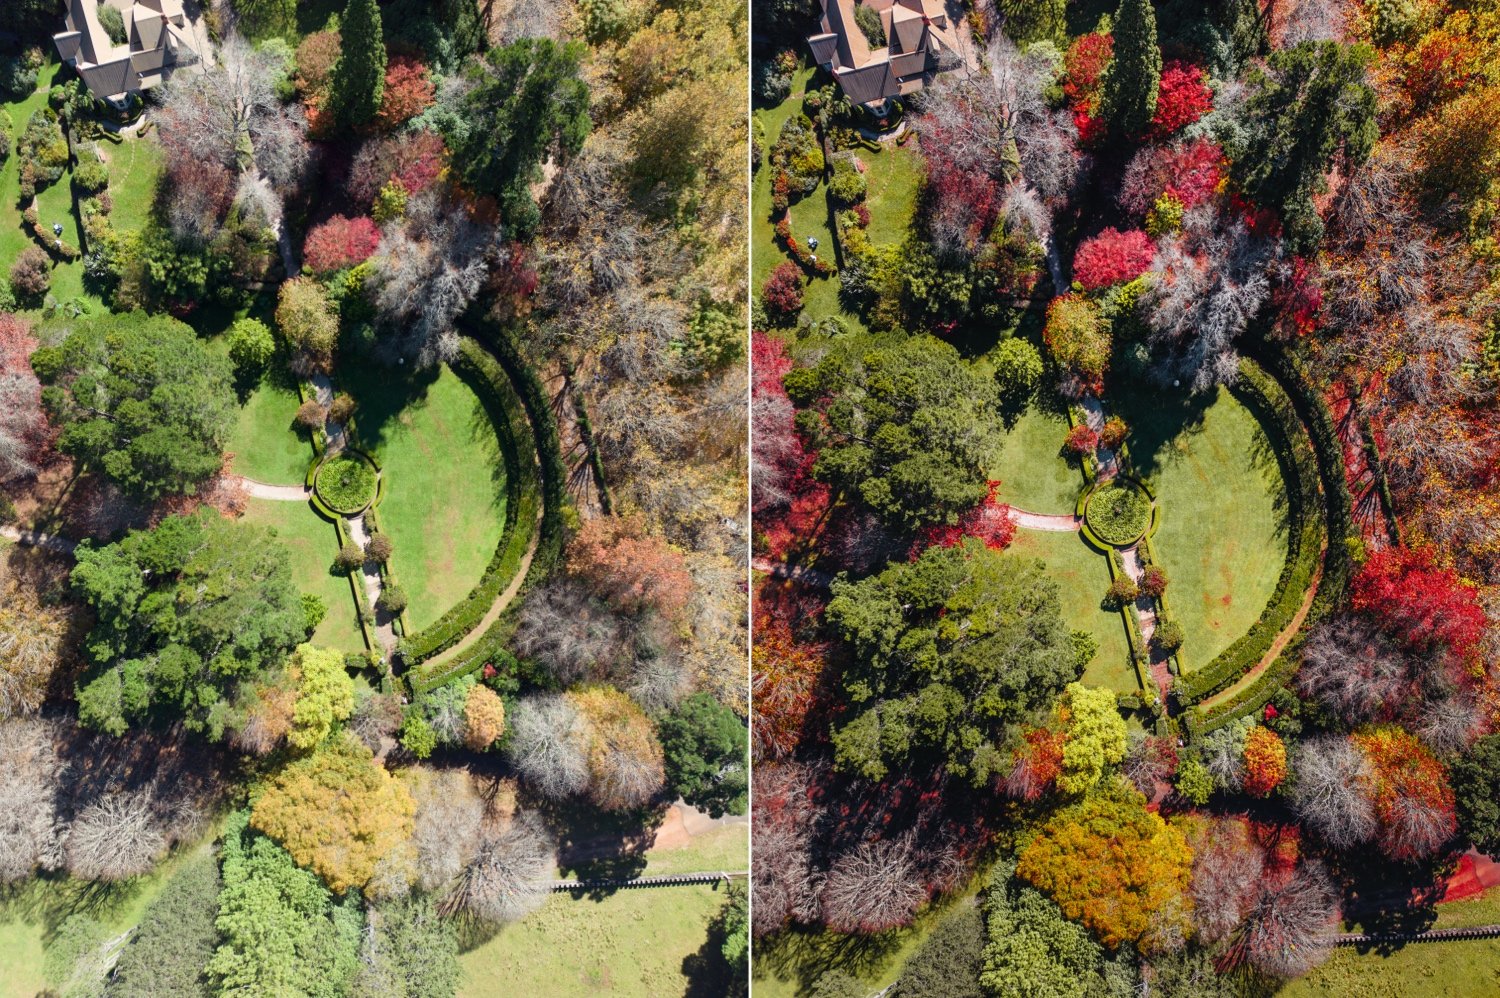
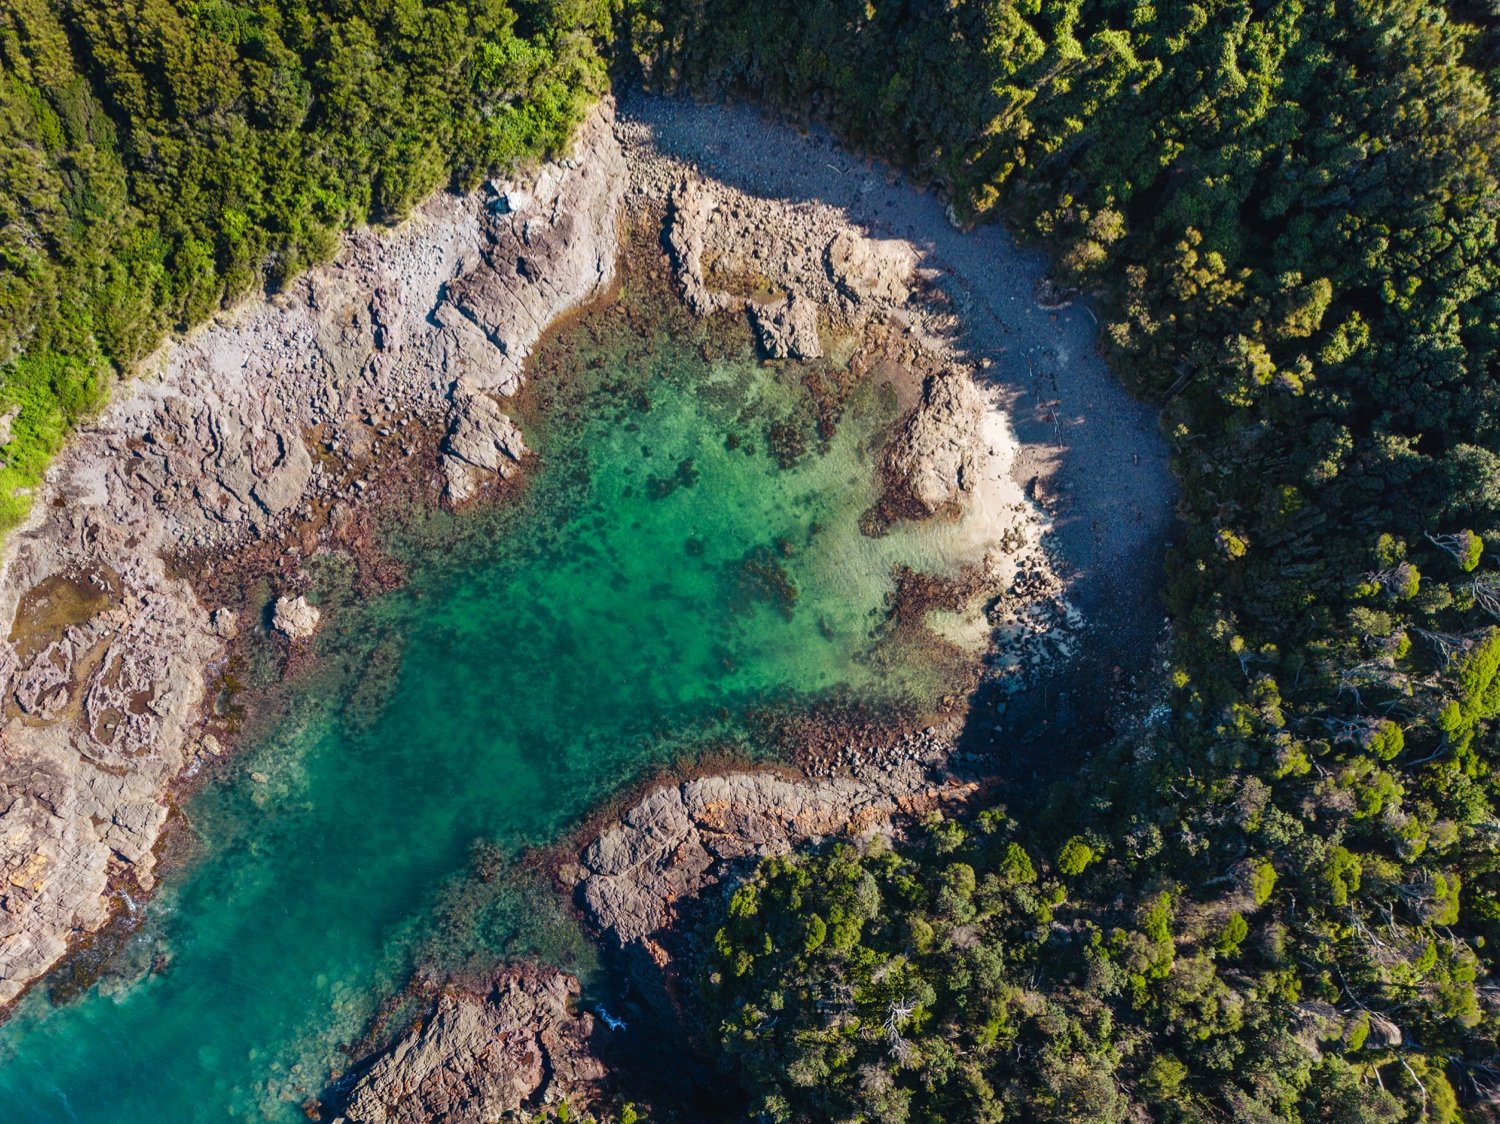
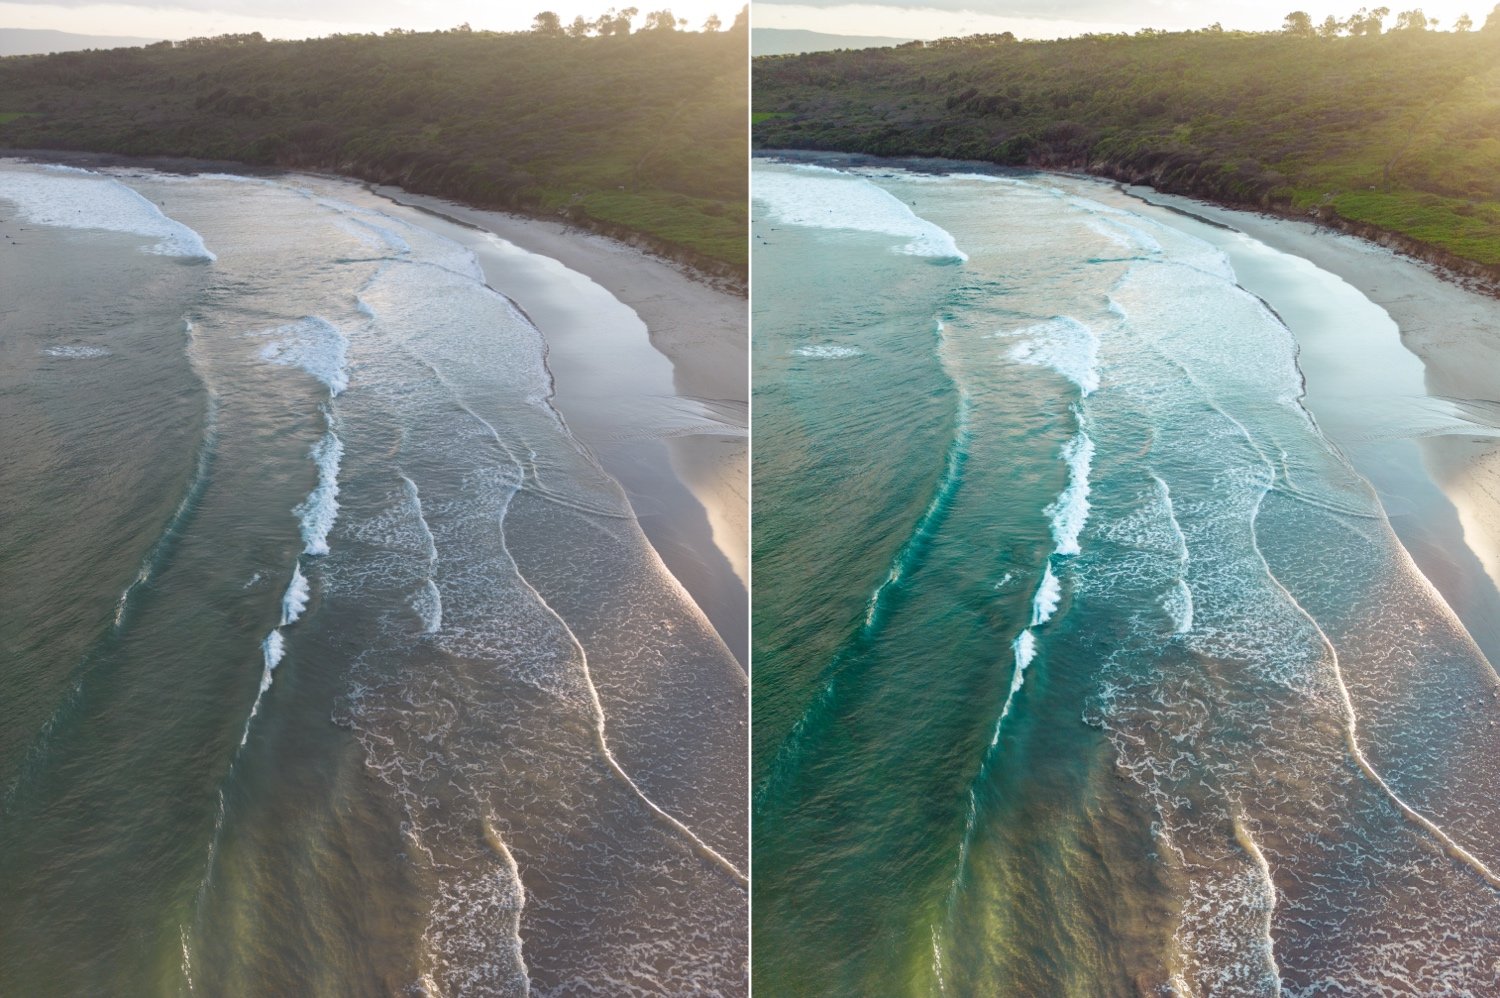
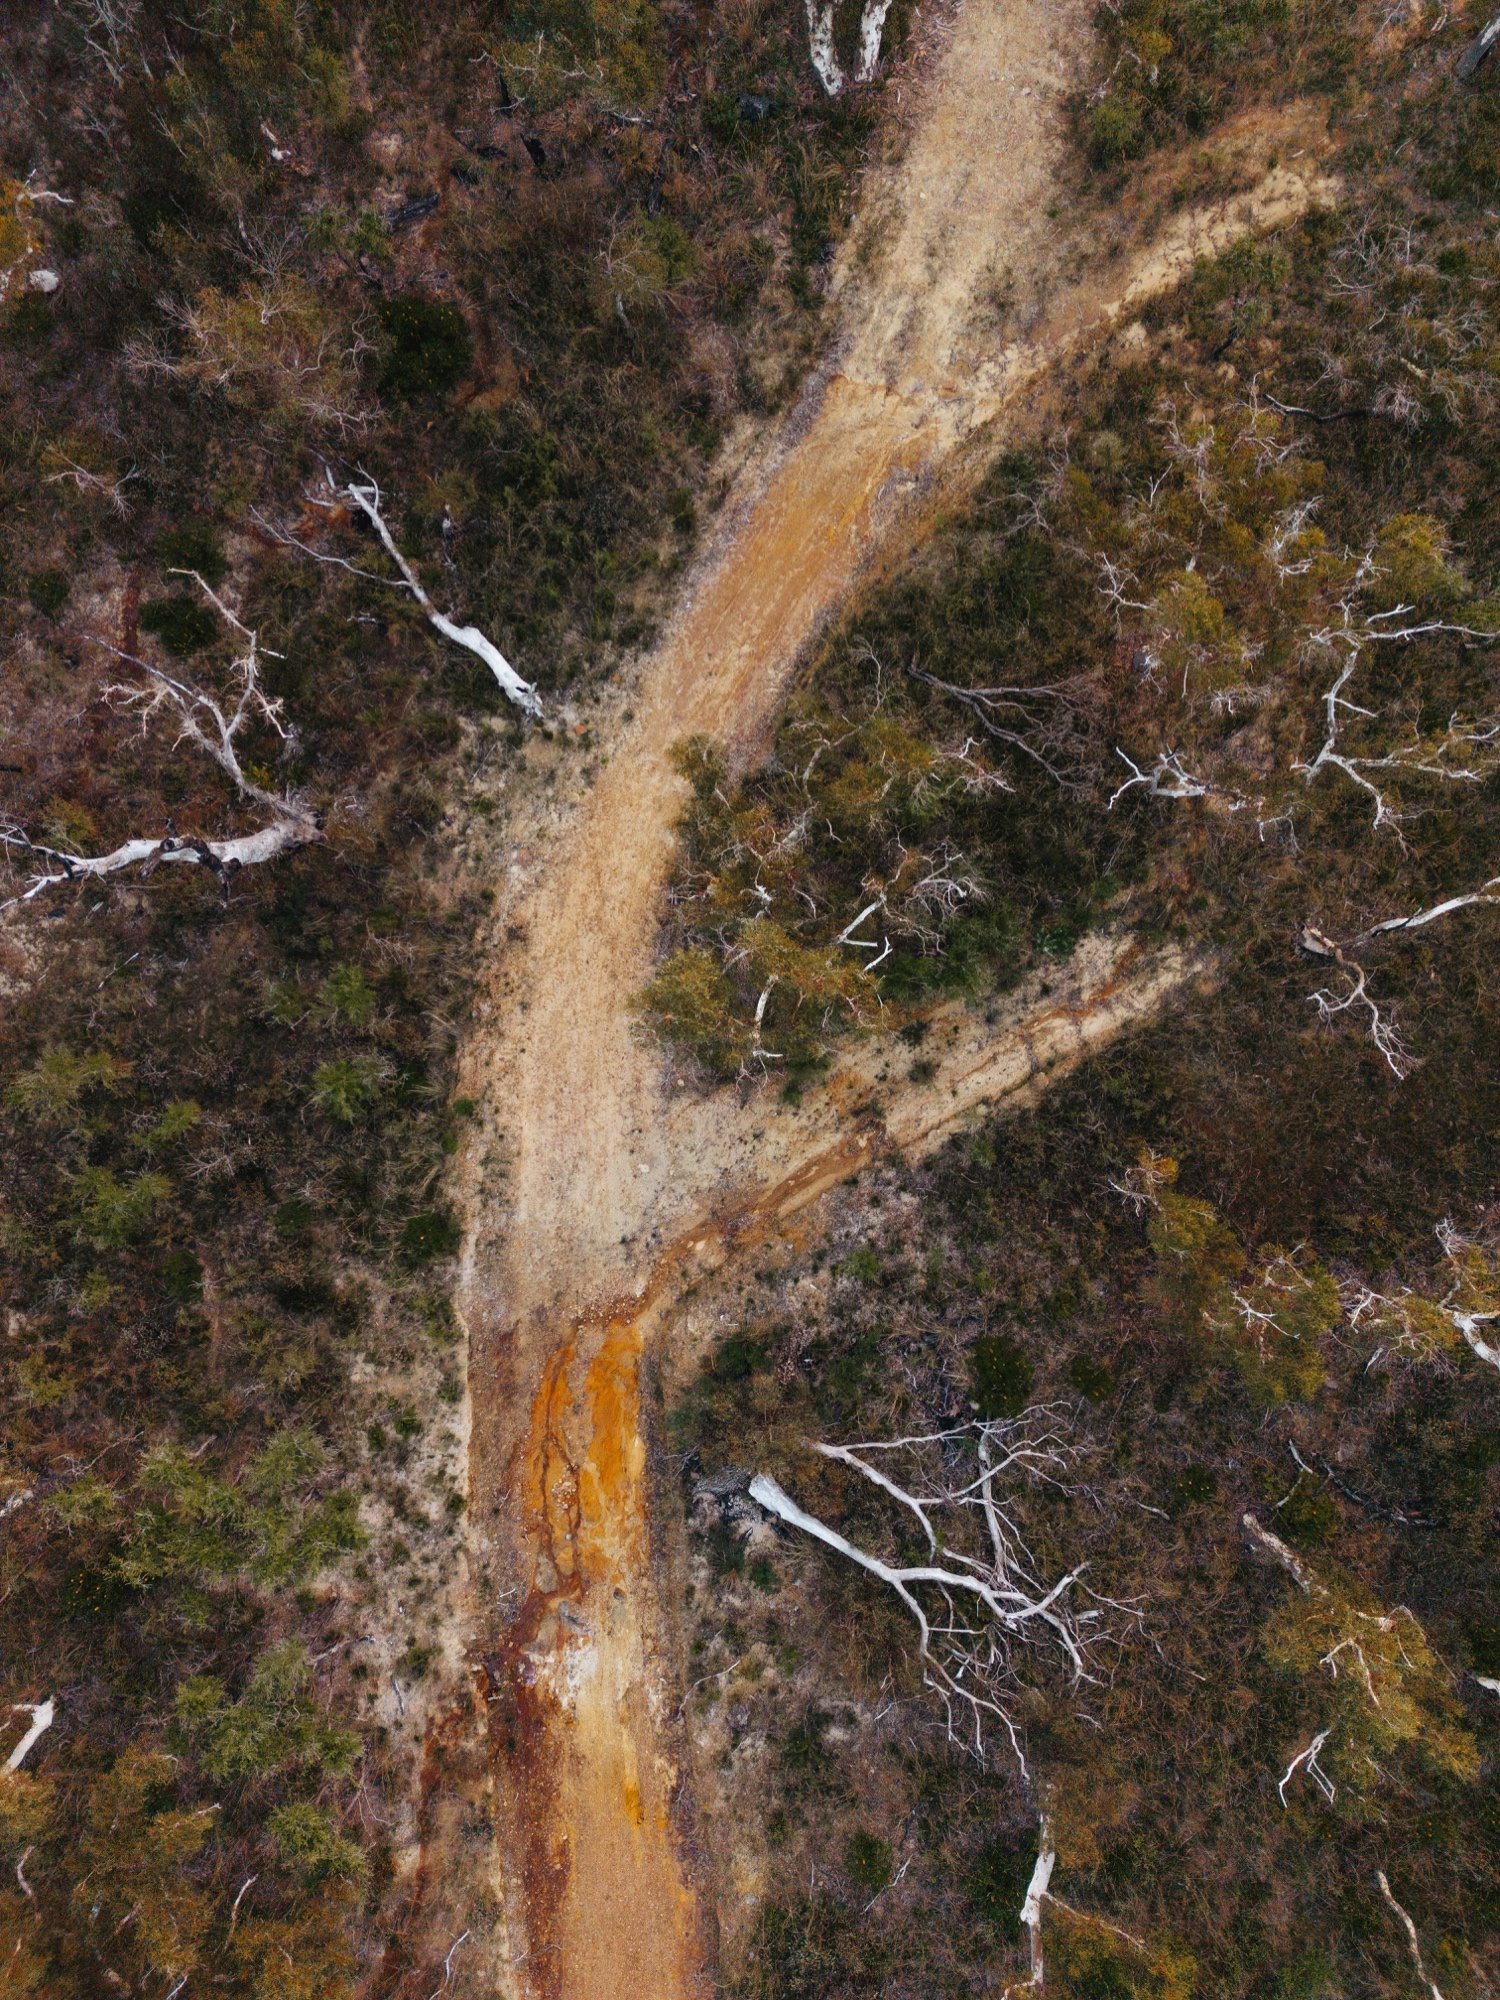
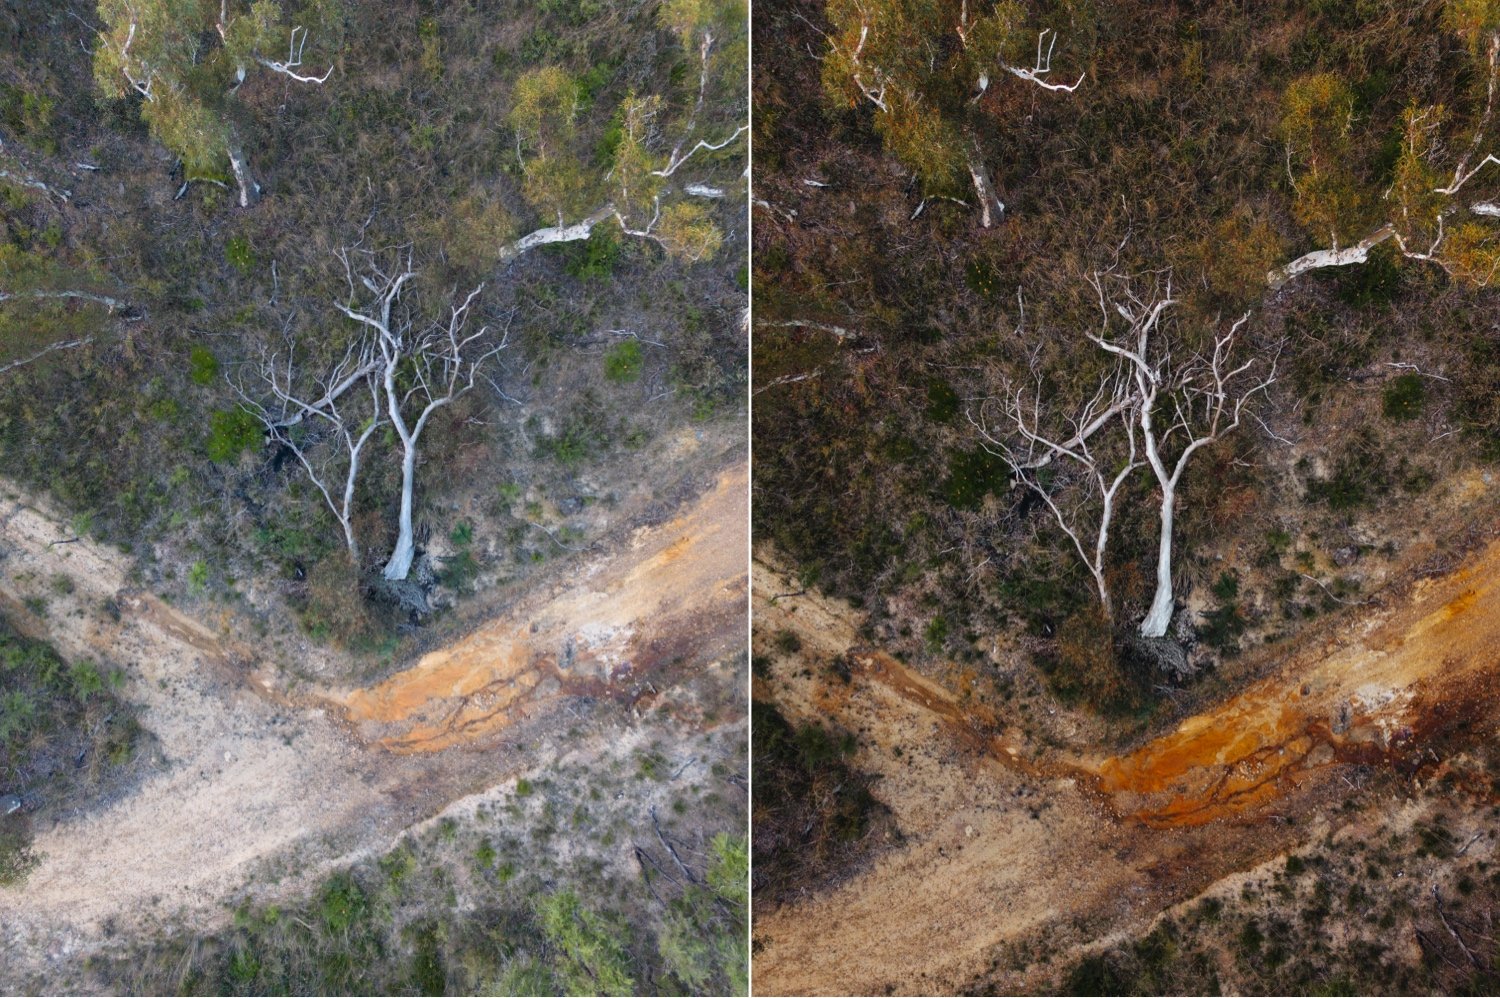
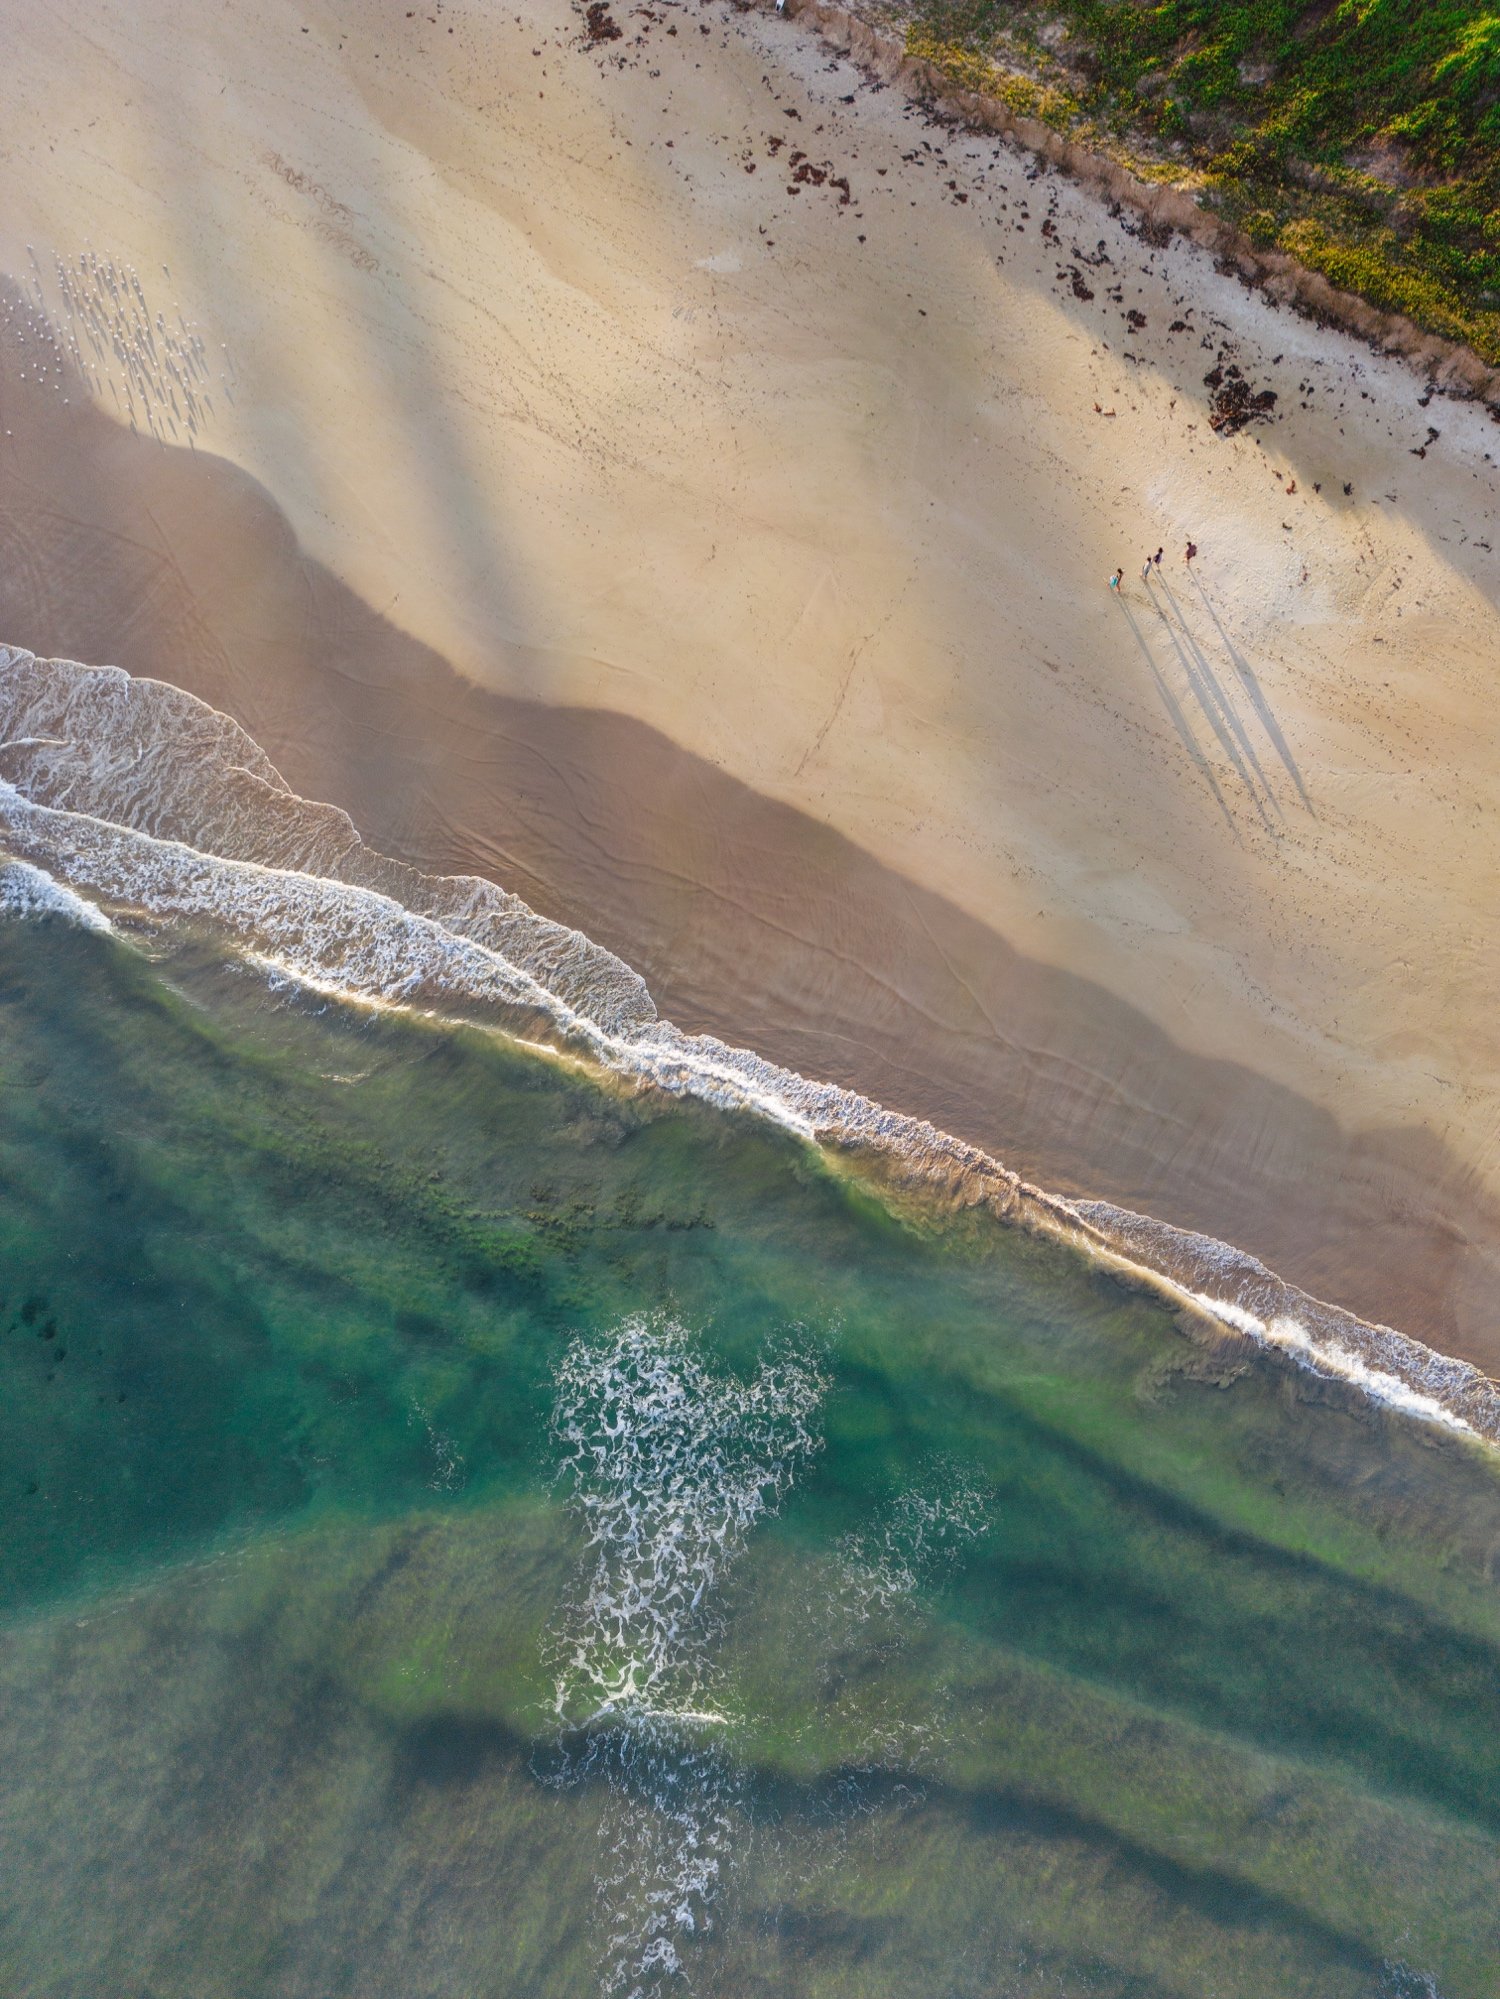
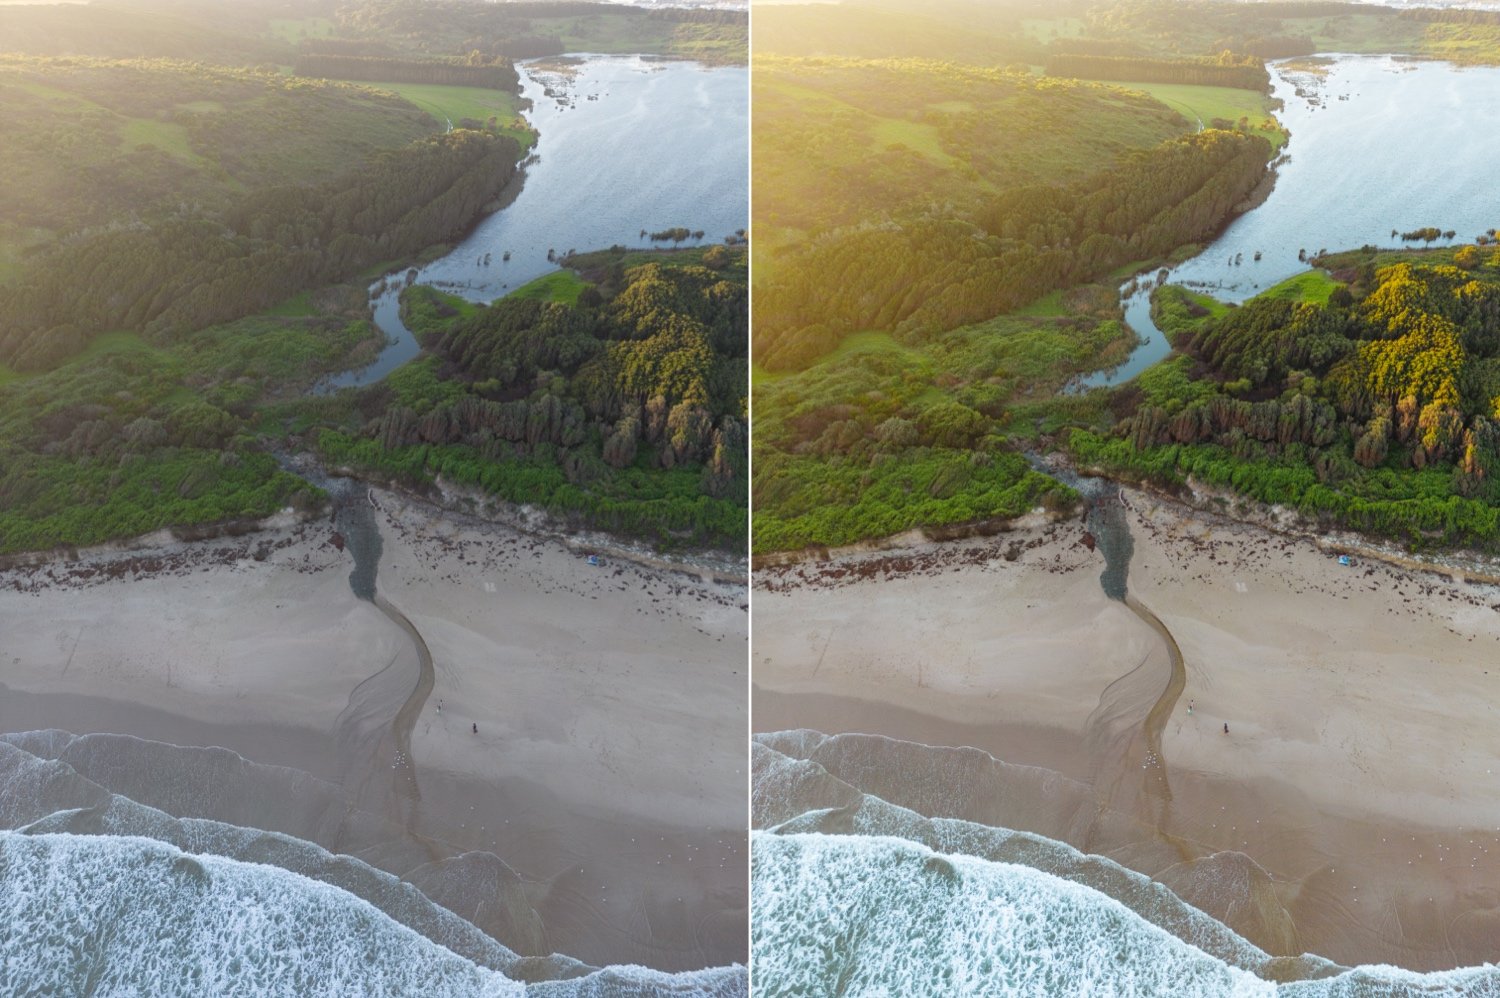
Below are a few photo examples as well as before and after images from the Mini 3 Pro. All photos are edited with my Aspen Lightroom Preset Pack.
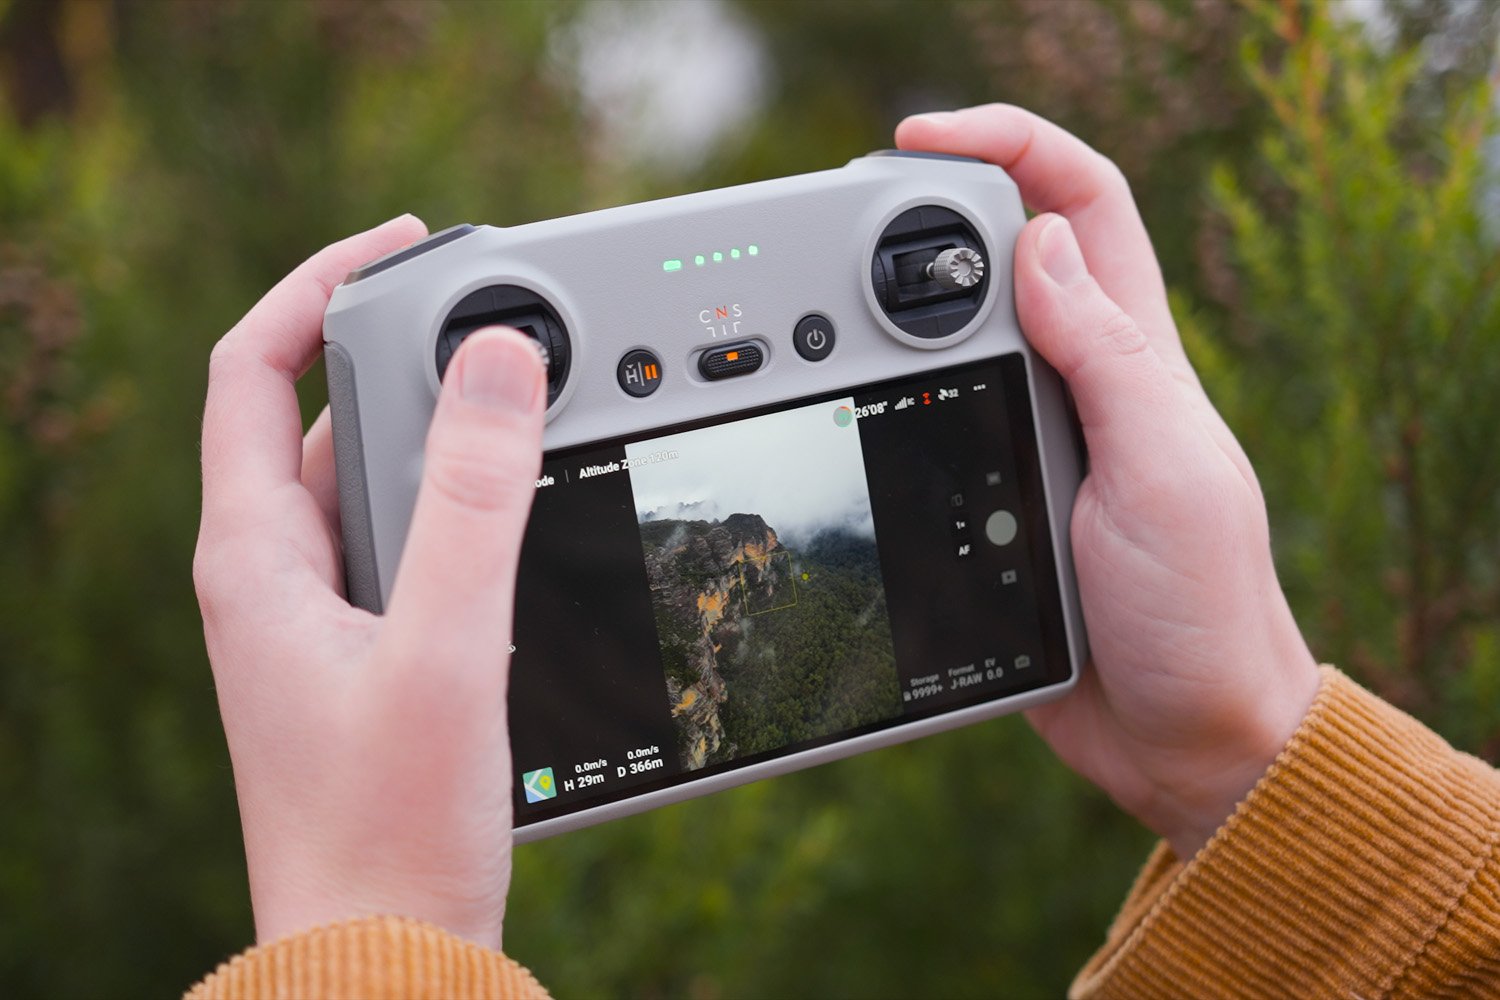
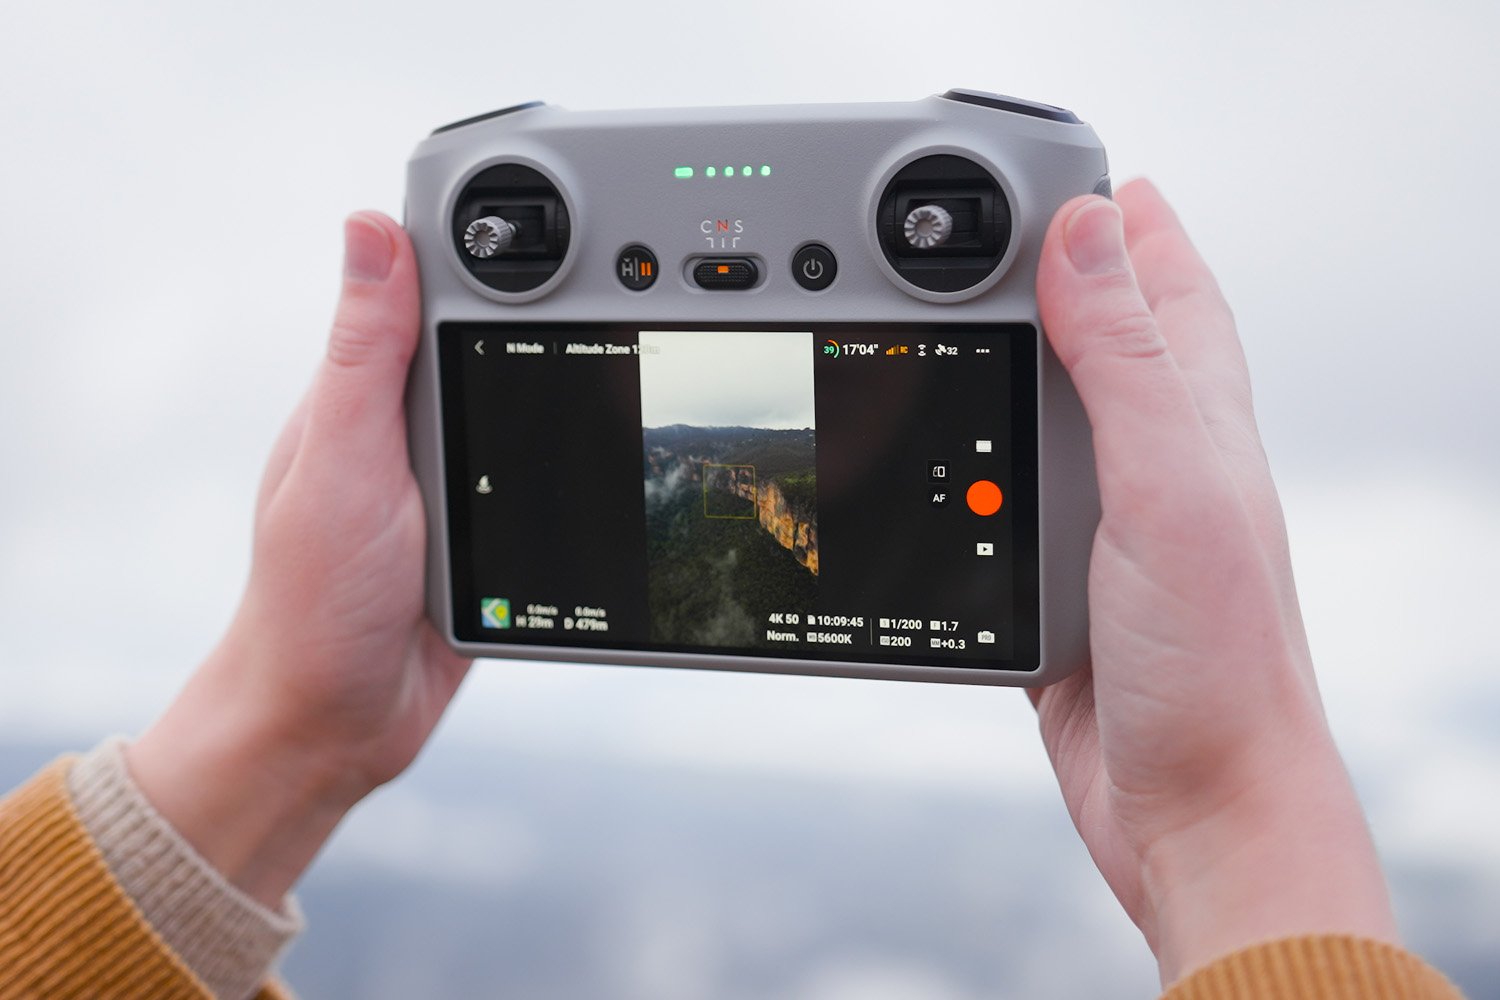
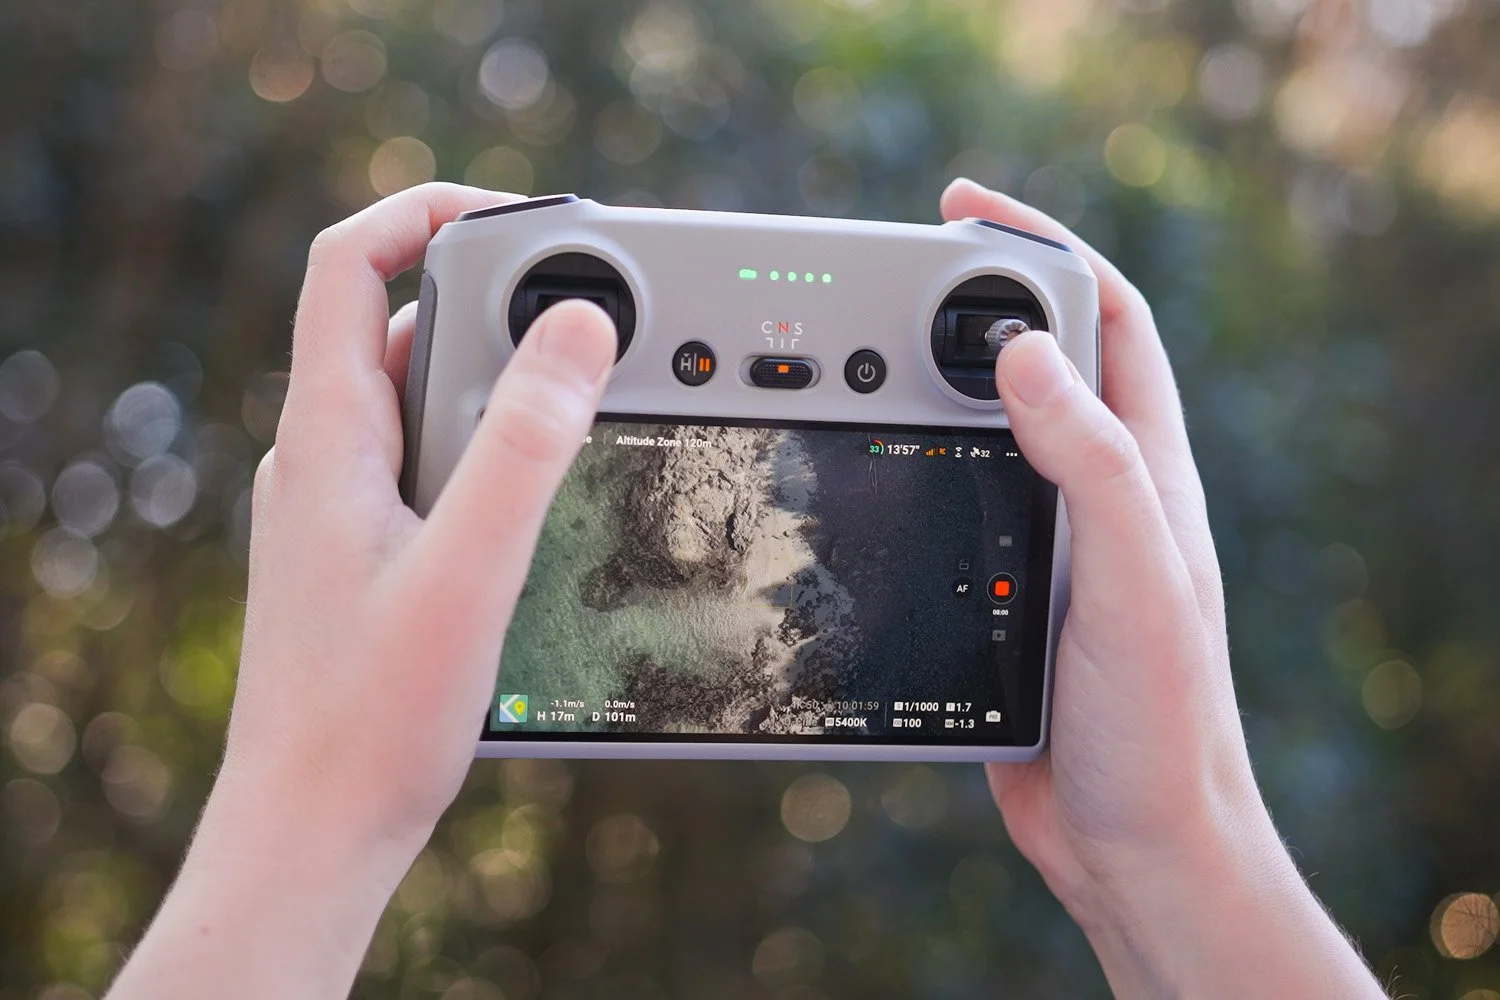
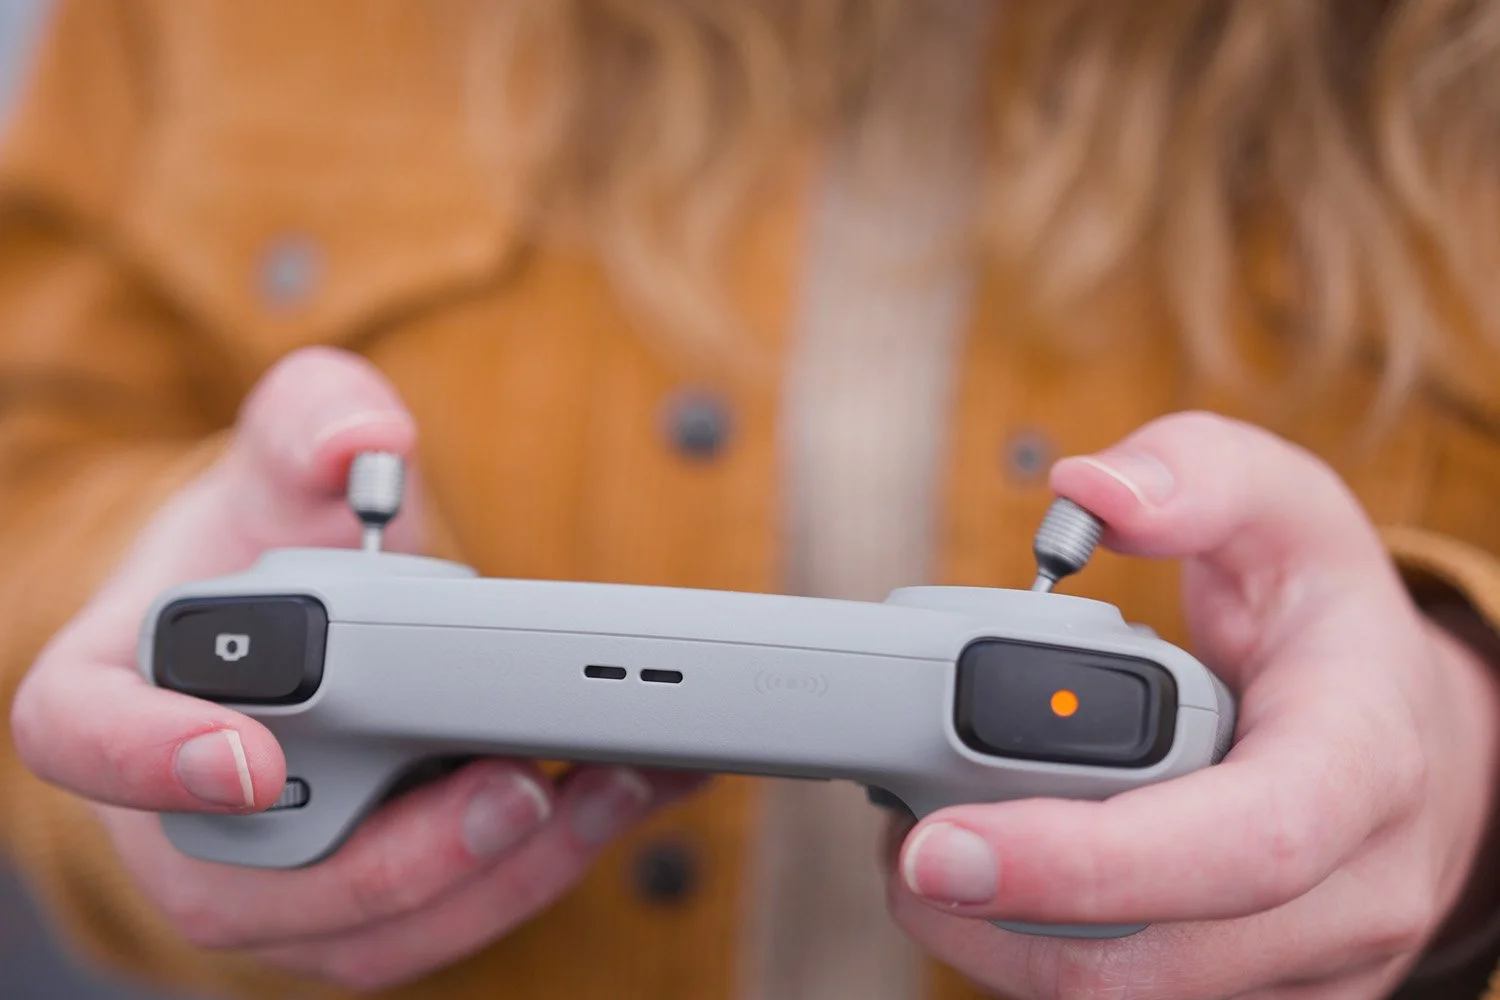
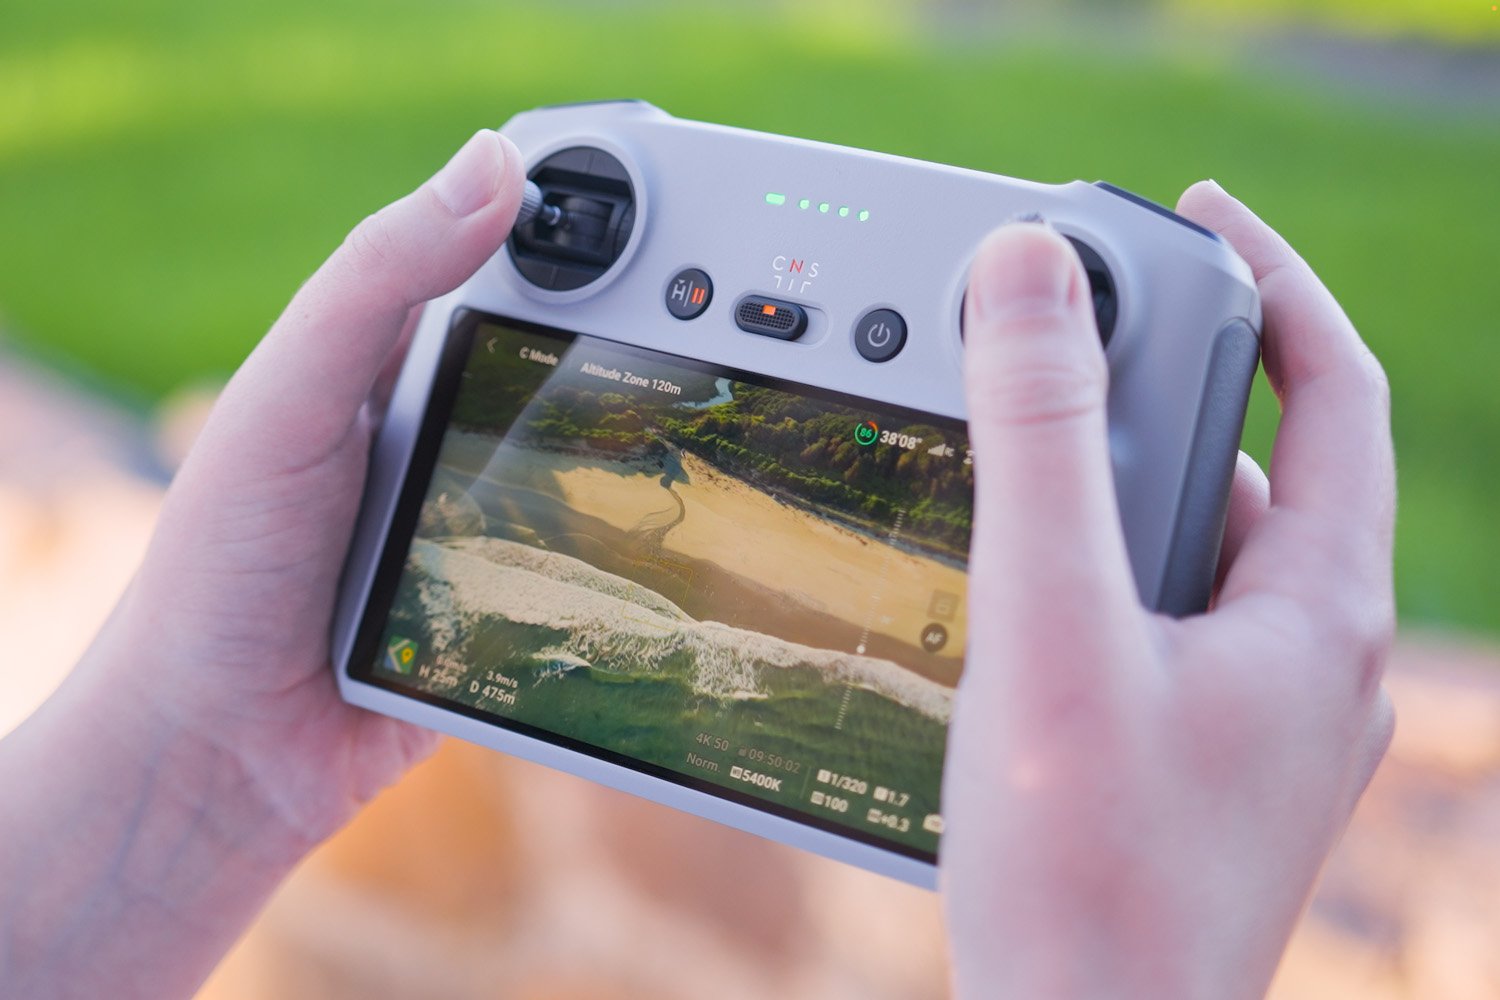
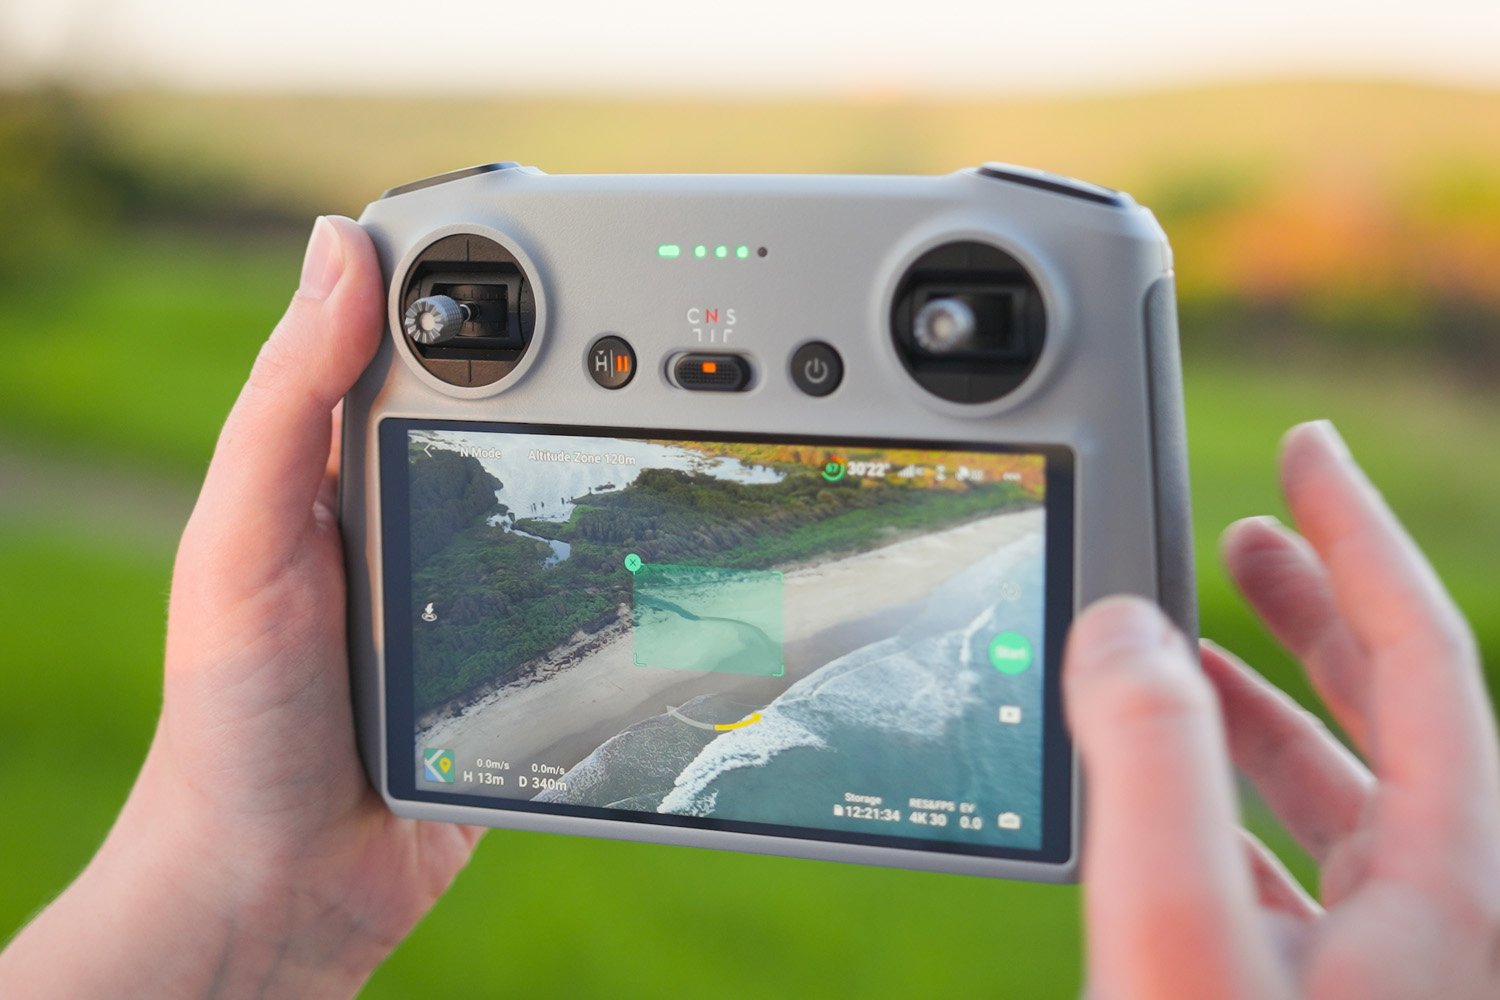
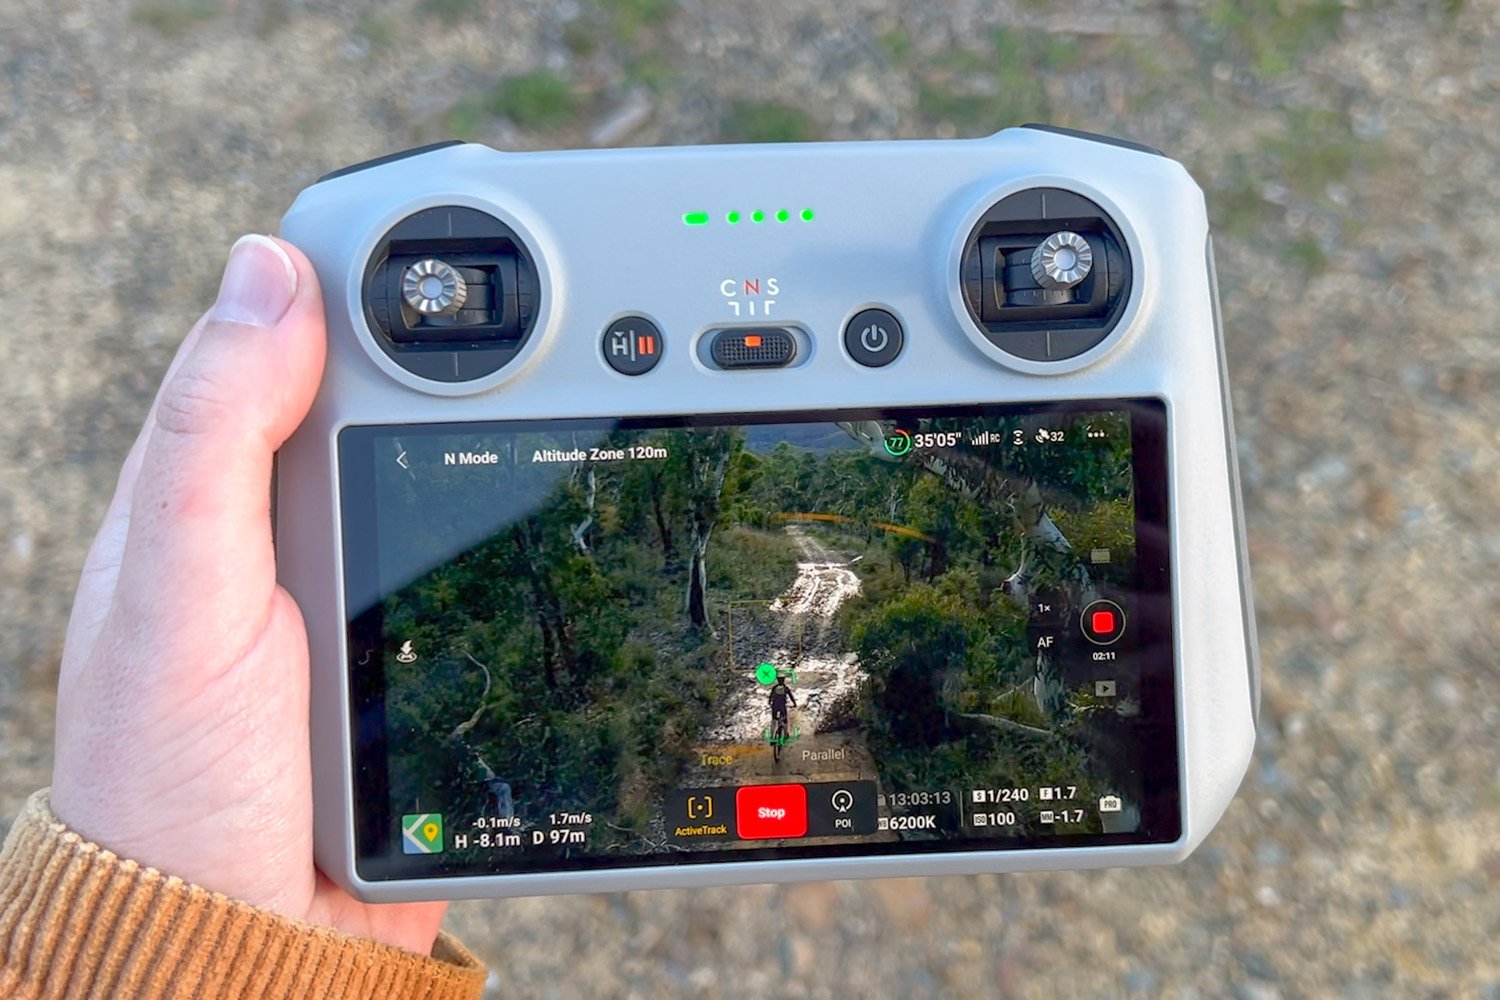
MINI 3 PRO NEW DJI RC CONTROLLER
With the launch of the Mini 3 Pro, DJI are also releasing the new RC Controller which I am using throughout my video. I am excited to see this new controller has an in built screen, freeing up the use of your phone. The new Mini 3 Pro RC Controller features 2 joysticks for movement of the drone. There are 2 dials on the back, one for tilting the Mini 3 Pro camera and the other for digital zoom. There is a Home and On and Off button. A toggle to switch between Cine, Normal and Sport mode. And finally 2 custom buttons - C1 and C2. I have C1 set as a shortcut to instantly change the camera to 90 degrees. I have C2 as a shortcut to switch between Vertical and Landscape mode.
D-CINELIKE
In my review video, I share video samples of D-Cinelike ungraded and graded. You can only record in H2.65 when in 50 or 60p and you have the option between H2.64 or H2.65 when in 25 or 30p. I also share a couple of video comparisons between the Mini 3 Pro and the Mavic 3 since they both film up to 4K 60p.

SMART FUNCTIONS
The Mini 3 Pro supports Mastershots, Quickshots, Hyperlapse, Panoramas and Tracking. I have examples of the Circle Quickshot and Hyperlapse in my review video. These intelligent functions are easy ways to capture cinematic footage. Something to note is the Mini 3 Pro doesn't currently support any of these intelligent functions such as Tracking and Hyperlapse in Vertical Mode. You can only use these functions in standard landscape orientation. I would love to see this feature added in a future firmware update.
MINI 3 PRO SUBJECT TRACK + OBSTACLE AVOIDANCE
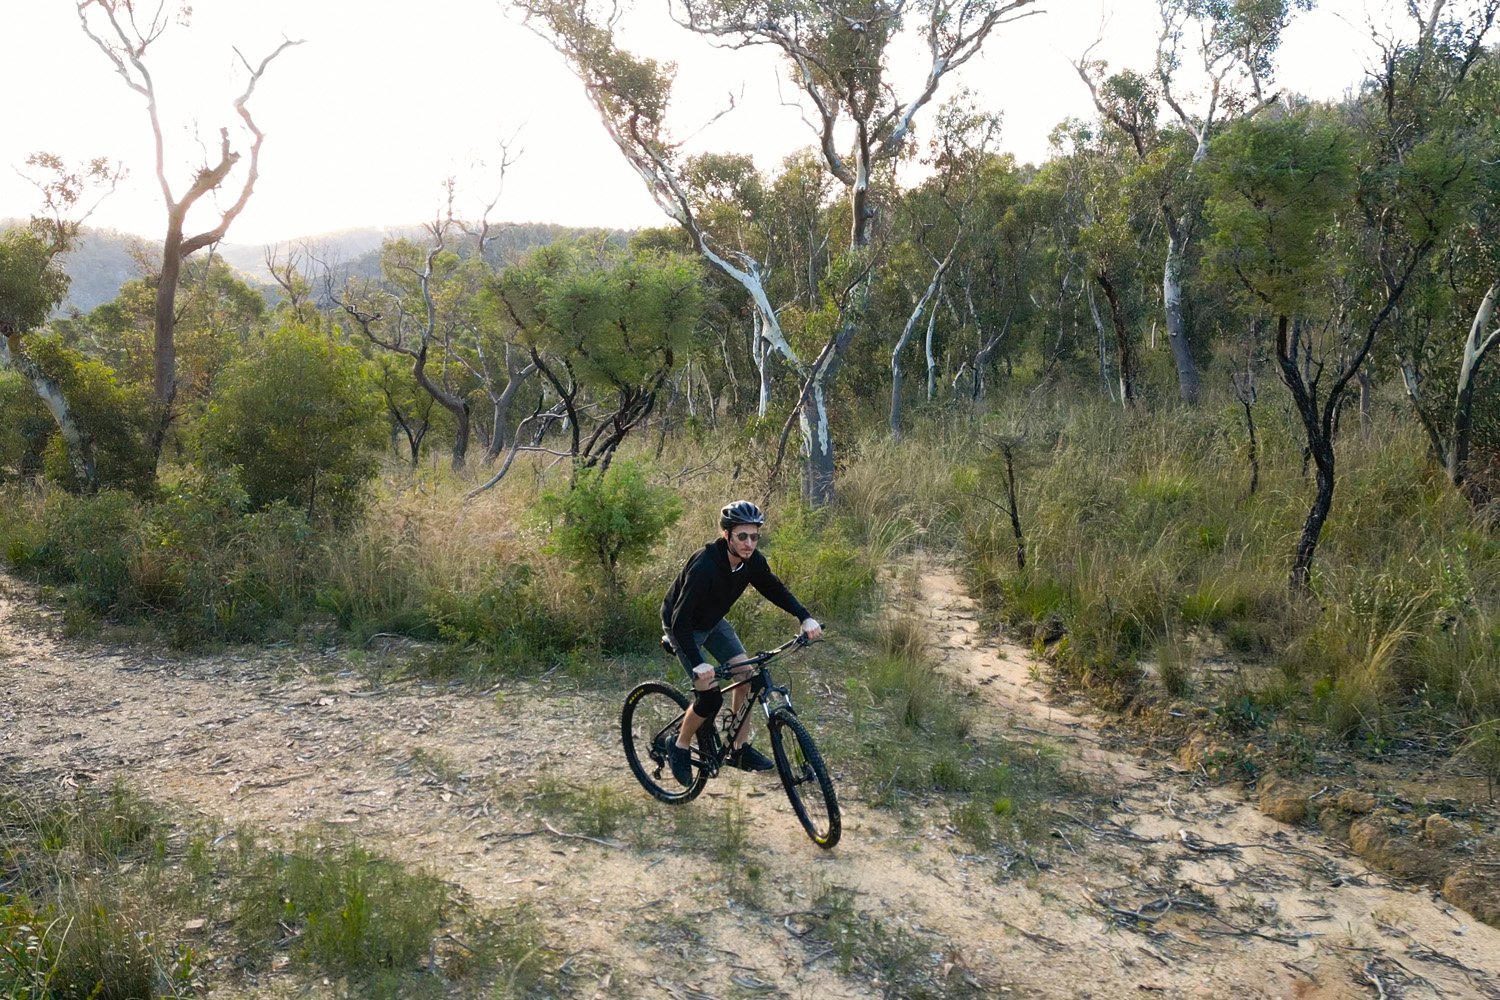
I had so much fun testing out the Subject Track of the Mini 3 Pro. We found a fire trail where Dan rode his mountain bike. This fire trail was busy with a lot of trees and bright, dappled sunlight. Even though it doesn't look like it, it was a pretty steep hill too! The Mini 3 Pro does a great job at avoiding obstacles, I have it set to bypass rather than brake. This drone has 6 obstacle avoidance sensors, 2 on the top, 2 on the bottom and 2 facing the back. See all the tracking examples in my review video. I share a couple of times where the drone lost sight of Dan. Aside from this instance, he was able to ride up and down the mountain 4 times where the Mini 3 Pro kept up with him without any issues. I share the entire clips I captured so you can see real world examples of Subject Track and Obstacle Avoidance.
All photos are edited with my Aspen Lightroom Preset Pack.